{Be prepared for a ton of pictures in this post!!}
Just like our kitchen, our main bathroom has gone through a major transformation. When I look at pictures, it’s hard to believe where we started.
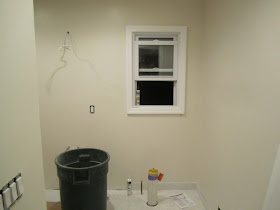
Our cramped main/guest bath used to look like this…an awkward space…with way too deep of a vanity.
Soon…we busted through the walls and took over the too-small-to-be-functional master bath that backed up to the main bath…as well as a small part of the “large” master bedroom closet. {See our “Floor Plan” page for more clarification.}
Once we had the space we needed, it was time to put things back together, and create a bathroom where guests and future kiddos would all feel comfortable.
And the journey does not stop here. I know the main bath looks very boring as is, and there is a reason for that. I always planned to put thick horizontal stripes on the walls, but it just wasn’t a priority to get done. Other things were “must do’s”…and once those were completed, I got an awful sinus infection that set me back a of couple weeks. Well I finally got better, and I no longer had any excuse as to why I wasn’t tackling my stripe project {except for the fact that I knew it was going to be the biggest pain in the butt…so I was being a baby and dreading it.}
I finally manned up and got to work this past Saturday. I started at 2:30 in the afternoon and finished around 1:10 in the morning. I had to take a break halfway through taping the walls because I RAN OUT OF PAINTERS TAPE! Yes, those capital letters mean I'm yelling about it. I was uber annoyed, but it gave me an excuse to take a breather, go to Home Depot and pick up some dinner with the hubby. I think I told myself and my hubby “what was I thinking” and “I’ll never do this again” about a million times, but I know myself, and since I loveeee the results, I will most likely do it again…or some sort of variation of it. ;)
So here is my labor of love to punch up our former very-neutral-for-a-reason-because-the-base-stripe-color-was-the-only-thing-up-on-the-walls-bathroom.
And this bathroom is definitely not finished yet. I still need to add some pops of color, some décor, and the current bath accessories will be replaced with some fun ones that are being shipped to me, as I type, from West Elm.
Anyone else tackle major projects on their to-do list this weekend?!?!?!


It looks amazing!! It make me feel like it's part of a spa or fancy resort. :)
ReplyDeleteI love it!! Can you go into more details about how you did it exactly? Did you use a level? Did your lines come out clean when you took of the tape? I really want to do this in the new house, so I'm just wondering about the details :)
ReplyDeleteI'm with Ashley! Details please. It looks amazing! Can't wait to see what you got from West Elm.
ReplyDelete-Diana
What a transformation! The layout is perfect, and the stripes look lovely!
ReplyDeleteWow, it looks great! I'd love to paint some stripes, just now sure I have the patience.
ReplyDeleteAmazing transformation!!
ReplyDeleteGorgeous! The stripes came out amazing and I love the dark contrast of the vanities and mirrors!
ReplyDeleteLOVE the striped walls....subtle, but big impact! :)
ReplyDeleteIt's beautiful! What colors did you use on the walls? What kind of flooring is that?
ReplyDeleteI have 3 bathrooms to tackle. This is so inspiring. I love the stripes and it makes me want to give it a try. Amazing job!
ReplyDeleteThank you so much for all the positive comments everyone!!! :)
ReplyDeleteHopefully I answered any questions in "The Stripe Saga" post...and if I didn't, feel free to ask away! :)
Adrienne, thanks so much!! The colors on the walls were Behr's White Clay (lighter stripe) and Sandstone Cover (darker stripe). The flooring is an 8in. x 12in. ceramic tile called "Boreal Marble Verona" from www.flooranddecoroutlets.com/. Hope that helps!
Thank you so much, Rebecca! Wow, three bathrooms is a lot to work on, but take it one at a time and they'll soon be beautiful! :)
Your bathroom looks absolutely amazing! Love the stripes.
ReplyDeleteThanks so much Melanie! :)
ReplyDeleteHi Gabbi! Thanks for stopping by my blog! I just read through a bunch of your posts and I love what you're doing with your house! I am hoping to put some stripes in my living room (ahhh!)
ReplyDeleteThank you for stopping by my blog too! Good luck with the stripes...the outcome is totally worth it! I loveeeee our bathroom! :)
Deletethe stripes look fantastic!
ReplyDeletevery chick!
Thank you, Cheryl! :)
DeleteI have been enjoying all your hard work and have spent hours reading all your posts...Love love love what a beautiful home you have turned your house into! I'm not sure if I missed it or not somewhere...but could you share where you found your vanities? I love them!!!
ReplyDeleteThank you so very much!! I got those vanities from Lowe's. They are the allen + roth 36-in Hagan Single Sink Bathroom Vanity with Top. Here is the link to the website: http://www.lowes.com/pd_319961-54446-69439_0__?productId=3202353&Ntt=vanity&pl=1¤tURL=%3FNtt%3Dvanity&facetInfo=
DeleteHope that helps! :)
Hey Gabbi,
ReplyDeleteOne question that I'm curious about. Why did you choose to go with 2 single sink vanities instead of a double sink vanity to make it one piece?
Hi Cheryl! When we were doing our reno, we were fixing up so many areas of our home, so cost was a major factor that went into all of my decisions. I knew I wanted two sinks in our hall bath, and I loved the look of the inexpensive vanities we went with...so it was a win-win that it was cheap and looked good (at least to me). Hope that helps explain my thought process!
Delete