Thursday, October 25, 2012

The Start of a House Tour.

I’m a very bad blogger.  I’m awful at posting regularly and I feel terrible about it.  I even managed to let my very first blogiversary pass by without positing!!  Boooooo me.  So since I’m almost a month late on that major milestone, I decided I’d try and make it up to all of you by finally starting a proper house tour of our casa.  I’ve shown some rooms here and there, and you’ve probably seen all the spaces while I was posting about projects and what not {because let's be serious...our house isn't that big}, but I just won’t be satisfied until I can add a “House Tour” tab to my blog. ;)

Plus, I really like taking a step back and seeing how far our little ranch has come in a year.  Sometimes you can get caught up in how much more you want to do, and easily forget how far you’ve already come.

Here’s a quick refresher on how things went down for us.  We closed on our home in August 2011, the day before Hurricane Irene hit.  We took out a rehab loan to purchase our house so we could buy and renovate the main floor.  We started working on painting and cleaning up the exterior in August and the interior demo began the last couple days of September 2011.  That is also when I started this lil' blog.  Our renovations took a couple months {although it felt like years}, and we were finally able to move into our home on Christmas Eve 2011.

I figure I’ll start our home's tour in the “great” room of our house.  This space used to have a defined entry/hallway, living/dining room combo and kitchen.  We quickly changed that closed-off space to make it more "us".  So without further delay, here are entirely too many pictures of one area in our home.

View from the front door...


View into the living room...


View from the corner of the living room...


View into the living room towards the front of the house...


View from the fireplace towards the front door...


View from the living room toward the basement stairs... 


View towards the front door...


View twoards the bedrooms and bathrooms...


View into the dining room...


View from the old kitchen entrance...


View from dining room corner toward the front door...


View from fireplace towards kitchen entrance...


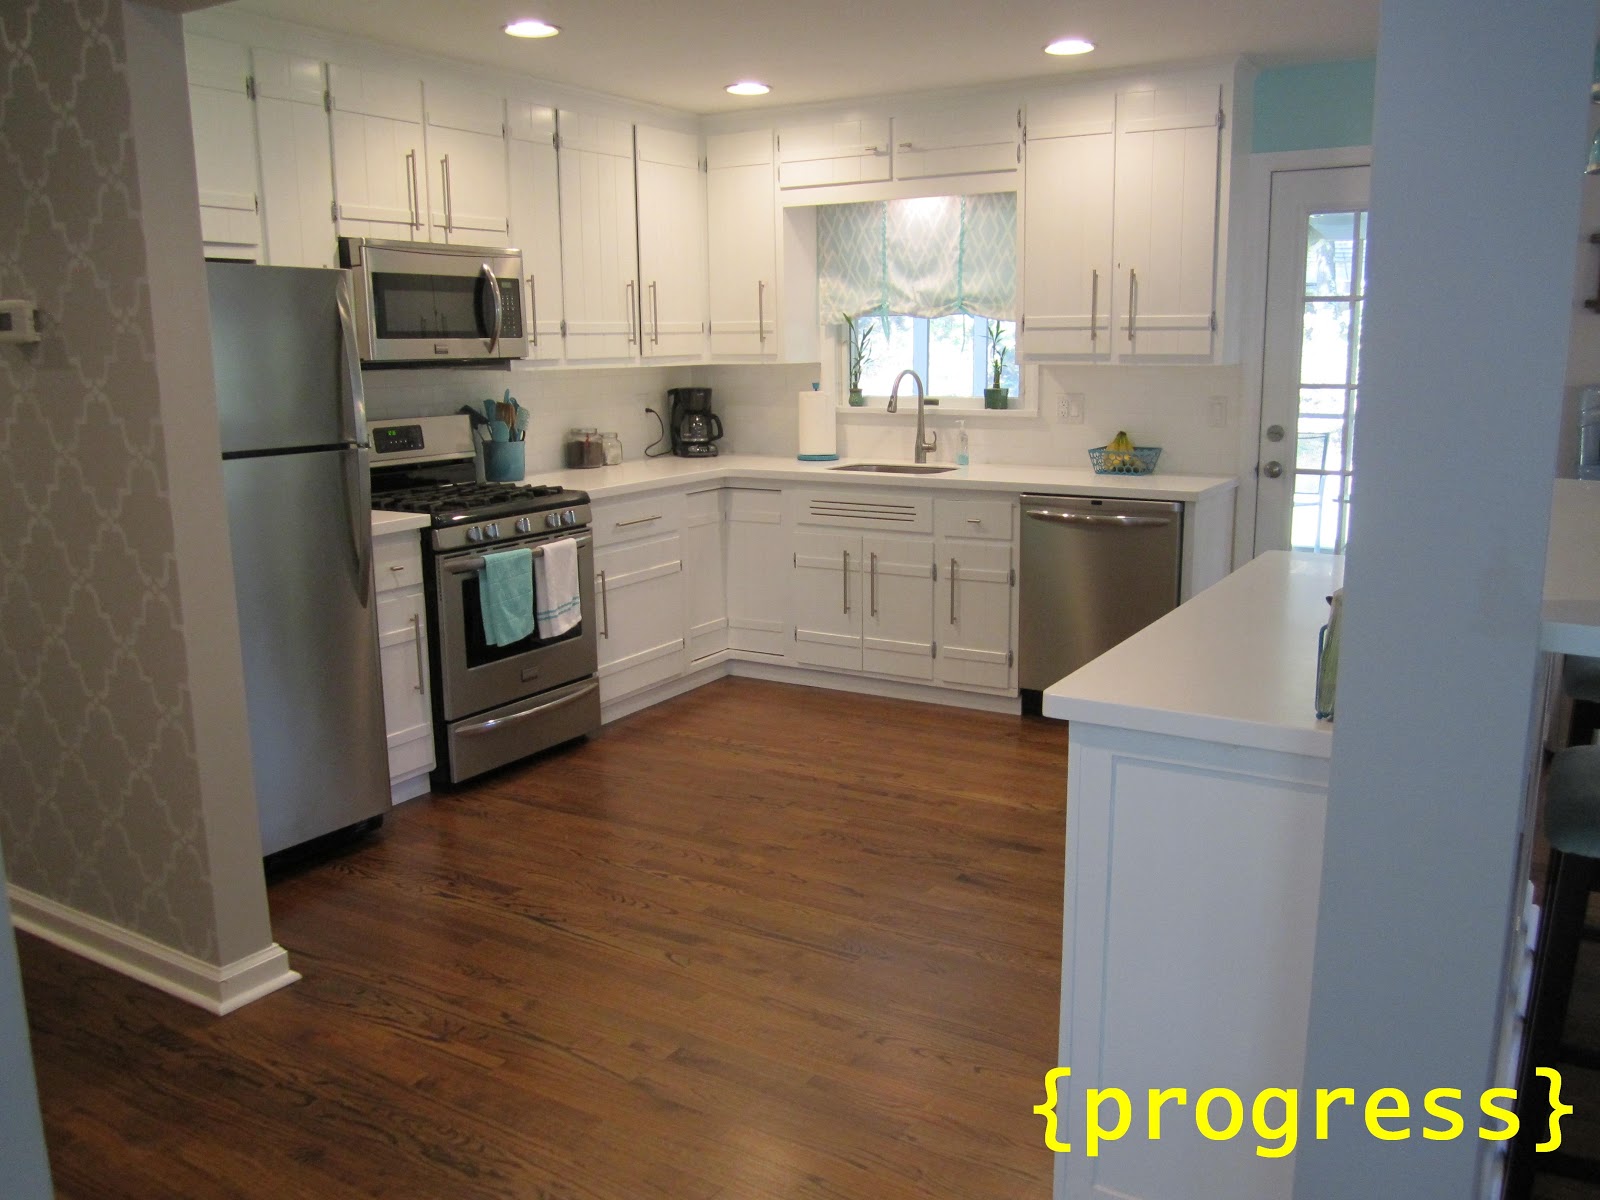
View into kitchen from hallway entrance...


View from kitchen, towards the dining room...


View from dining room entrance to hall entrance...


View from hallway towards the kitchen/dining/living rooms...


So what do you say...do my bagillion pictures of the same-space-from-every-angle-possible make up for my sporadic posting schedule?!?!  I'm praying the answer to that is yes, and in return I will give you a totally non-creepy Internet hug and hopefully post more house tour pictures before Thanksgiving rolls around. ;)  Kidding!!  {Sort of.}

Tuesday, October 23, 2012

Cheap and Easy...


We’re talking about artwork here people!!! ;)

For quite some time, only two things hung on the walls of our master bedroom…my favorite mirror and the jewelry organizer I made from an old paper towel holder and a frame.  I knew I needed to get a couple more things on the walls, but I didn’t have a huge budget to do so.  Thankfully, I was able to get creative and use a lot of things I already had on hand to fill our walls up a bit.

For my first piece, I headed to our basement and found some old stain and a piece of wood I purchased at Michael’s months ago.  Once the stain was dry, I got out my Crayola paint brushes and some white craft paint.  I wanted to stencil a line from our wedding song onto the wood for a simple, but meaningful project...but then I decided to get all craaaazy and just use my own handwriting.  It would add even more of a personal touch, and it’d force me to forget my perfectionist, OCD ways go out of my comfort zone.

I practiced the words a couple times on a piece of cardboard.


Then I threw caution to the wind and went for it.  The spacing isn’t perfect...and neither are the letters, but that’s okay.  I pretty much knew that was going to happen when I nixed the whole stencil thing.


For my second, third and forth pieces, I used some computer paper, craft paint, a foam brush and a couple stencils from a pack of Martha Stewart stencils {purchased from Michael’s the same day I bought the wood piece}.  I squeezed some white, gray, aqua and black paint onto my cardboard that I wrote on earlier...dipped my brush into a couple colors...and dabbed the colors onto the computer paper.  The patterns I used from Martha were smaller in scale than the piece of paper I was using {most were supposed to be used as borders on things}, so I just repeated the pattern over and over until the whole page was covered.  As the paint dried, the pages slightly rippled.  I expected this to happen since I was painting on, well, computer paper.  I was hoping it wouldn’t be a big deal and that they’d flatten out when I framed them in my 50% off Michael's frames.  Thankfully, they did. 

Here are my ummm, “masterpieces”. Ha!


And here is how everything looks hung in our room.  It might not be the most perfect or permanent art, but it works for now {and for our budget}.  


Anyone else get their Picasso on lately?

Thursday, October 4, 2012

That. Just. Happened.


And I still can’t believe it did.  Really.  Can someone pinch me?  Because somehow our kitchen has been featured in a national magazine.  That you can actually buy.  On newsstands.  And online.

This whole dream started back in April when I was contacted by Better Homes and Gardens to feature our kitchen renovation in their Special Interest Publication, Real-Life Kitchens & Baths.  They were putting together a new column that featured blogger remodels and helpful tips they learned throughout the process.  Although I didn't count out the fact that I could possibly be getting punk’d, I jumped at the amazing opportunity.

Fast-forward to this past weekend, and picture me staring in disbelief at this...


Absolutely cray cray.  {That means crazy, Mom. ;)}

The full article also featured two other remodels.  Both of these gorgeous redo's were bathrooms, and they are definitely worth a look-see!  You can find their blogs here and here.


And, of course, a big, huge thank you to Maria Charbonneaux who wrote the article!

Wednesday, October 3, 2012

Several Months in the Making

Are you ready for it?!?!  I’m talking about a project that took entirely too many months for me to complete!!
………………………
……………………
………………
…………
………
……

No, no.  Don’t get all excited.  It’s only a teeny, tiny gallery wall took me way too long to cross off my to-do list.  {But hey, I’m all about full disclosure on this lil’ sliver of the web...even if it means embarrassing myself for all to see.}  Unfortunately, the wall ended up being one of those projects that didn’t keep my full attention.  I would get easily distracted by other stuff, and drop the gallery wall like a bad habit.  Here is how it all went down...

I started by collecting a bunch of interesting, but mis-matched frames from Home Goods in the spring.


I spray primed and painted them white.  I forgot to take a picture of this step, so instead I will include a gratuitous shot of my hubby’s backside to show our old patio-ish area that served as my spray painting spot until we demo’ed everything this summer.  All that white on the ground = proof I was spraying my heart out.


Then the poor frames sat in our guest bedroom for several weeks until I found the motivation to get to hanging.  I wasn’t sure how I wanted to arrange everything, so I played around with the frames on top of a piece of rosin paper {left over from covering our refinished hardwood floors}. 


I thought I’d trace the frames onto the paper, hang the paper, and easily transfer the arrangement from the floor to the wall, but I changed my mind midway through.  I decided to wing it, start from the “middle” {that I eyeballed} and work my way out instead.  


It wasn’t the most accurate method, and I may or may not have made a few too many holes in the wall, but it’s nothing a smidge of spackle and some paint couldn't fix. ;) 

Once everything was hung and I gave two thumbs up to the placement, the frames stayed as is...for wayyyy too many weeks.  Yup, I literally got used to seeing this...several price tag stickers and all.  Not cute.


So during our recent staycation, my Mom suggested we get busy filling the gallery wall with actual pictures.  Point taken.  The gallery wall had been 90% complete for long enough.  I started to hunt through all my photos.  My goal was to display pictures of our entire immediate family {me and hubby, our parents, my sister’s family and hubby’s sister’s family}.  Once I picked out all of the winners, it was time to turn them into B&W, and have them printed.

I also found a free fall printable online to fill up the center frame of the wall.  I wanted a pop in the middle of the black and white photos, and I love that I can switch out the 8x10 to coordinate with the seasons/holidays.


While this isn’t the most fantastic gallery wall, like say, YHL’s awesome hallway, it still warms my heart because IT’S DONE it represents our entire family.  I love having something sentimental to finally look at every day! :)

Anyone else take a crazy long time to complete the easiest projects???