I know I should have named this post something proper like "How to Repair a Crack in Plaster Walls", but 1) that wouldn't have been half as much fun and 2) that would imply that I have some sort of expert knowledge, and we all know that's not true! ;) So please forgive my lame-ness, continue reading my post. K, thanks. :)
For more months than I want to admit, we’ve had tape bubbling off of our wall like this.
The underlying crack had been there since the day we looked at the listing...and while we were going through the major renovations of our main floor, we added the task of repairing the cracks in the plaster to our contractor's punch list. Unfortunately, the repair didn’t last very long and the tape bubbled after a few months {like you see above}.
I recently contacted a couple pros from Angie’s List for estimates to repair this. They were between $200 and $300 to repair that crack (plus another one in the hallway ceiling that was missed all together by our contractor). Much of the expense was due to the fact that they would eat into at least half a day to apply all the coats of mud they needed for the job. One pro told me what steps he’d take to repair things, and he led me to believe it wouldn’t be too hard for a homeowner to do themselves.
After hearing from him, I decided to give it the old college try.
I started by exposing the entire crack. {The other patches you see are from electrical work we just had done.} I used a box cutter to slice out the tape that was bubbling. I just ran it along the edge where the tape seemed to be. After I got through the paint and a little of the old mud that was applied, the area just seemed to peel right off. Easy peasy.
Once the whole crack was exposed, I worked my way along the crack gouging it out {forming a little “v” notch in the wall}, and removing anything that seemed loose. A small screw driver worked best for me, but I’m sure there is a “proper” tool that probably does this a little better.
Here is the top of the crack, how it looked after the tape came off, before I removed any loose plaster...
And here it is after.
Once that was done, I used an old paintbrush to brush out the crack and loosen up anything I might have missed. Then I vacuumed out the crack, and wiped everything down with a damp paper towel.
After things were dry, I applied some caulk to the entire crack, working it into the crevices and getting any air bubbles out. I left that to dry over night.
The next day, I used some fiber glass mesh tape and taped over all of my cracks. I cut the tape into several pieces to do this because I made sure the crack was in the middle of the tape at all times. Our crack is clearly not one straight line, so there are a couple areas of tape slightly overlapping.
Then I used a putty knife and applied the first layer of joint compound.
I made sure to work this product into the crack as well, so no air pockets would end up behind it.
I used a smaller putty knife that I already had, as well as a much wider one from my neighbor.
I left that to dry overnight.
The next day I used the putty knives to scrape off any high points, and then used a drywall sanding block {also from my neighbor...thanks Taylor!!}, and sanded the edges of things down. Luckily, since I was conscious of it when I applied the first layer, there wasn’t too much to sand off. After things were sanded, I wiped the wall down again, and applied my second layer of compound.
This coat was much lighter than the first one. I let it dry overnight.
The next day I sanded things down again, and then wiped the wall down one more time. I didn’t need too much more mud, so a light coat here and there is all I applied.
I let it dry overnight again, and then sanded the following day.
To make sure things were smooth and ready to be primed, I closed my eyes and traced my fingers over the wall. Because the color of the wall and the mud differed, my eyes would sometimes play tricks on me. It'd look as though there were several areas I needed to sand or even mud again to get a smooth surface, but when I'd close my eyes and just feel with my fingers...I'd "see" there were no bumps or ridges and I was really good to go. Finally it was time to prime!
We had plenty of primer left over in a big 5 gallon bucket from when we were priming things after our reno.
I grabbed one of the buckets we had left and put a coat on the wall, including the areas the electricians patched up. I put two coats of primer over everything...
 |
| One coat. |
 |
| Two coats. |
...and then two coats of wall paint. Luckily, we had plenty of that left over in the basement as well.
 |
| One coat, still wet. |
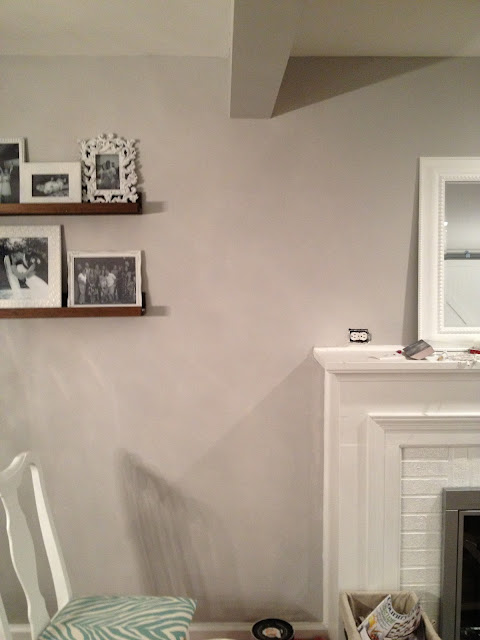 |
| Two coats. |
I have to say, I was pretty nervous how this would turn out with me tackling it...but I’m glad I gave it a shot! I was able to save us some money, and learned a new skill in the process. Plus, when this crack pops up again {like the pros said it will continue to do over and over...ughhh}, I will tackle it head on, with confidence! :)
PS-I am in no way, shape or form an expert on this type of repair {obviously}. This is just how I fixed ours, and I wanted to share it with my friends...especially those who asked for a tutorial!


