
A few posts back I mentioned I was in the middle of making over our bedroom for the millionth time. I showed off our TV gallery wall that was (ahem, I mean is) 99.9% complete and I'm here to share another project for that room that isn't quite finished...but it's oh-so-close!


This was a project that both scared and excited me. It's been floating around in my head for a very long time (for real...this makeover has been underway, mostly in my head, for almost a year), but I kept going back-and-forth on it. Going forward would mean painting over my beloved Balmy Seas and tackling a stencil project on top of that. {You would think I'd be sick of stenciling after this, this and this...but nope, I'm still smitten with the results.}
I realize I was hemming and hawing over something that was just paint, and if it didn't work out, I could just get more beautiful blue-green paint, sand down the stencil and repaint my wall, AGAIN...but to be honest, the thought of putting all that work into something I could totally hate didn't sound like fun. Time is so precious, and I have about one million other DIY projects to tackle! ;)
So I put the project off for months, but it never disappeared from my thoughts. I took that as a sign to stop being scared and lazy. I needed to get the idea out of my head and onto the wall to see if I would actually like it.
Spoiler alert, I didn't like it, I loooved it! And thankfully, hubby did too.
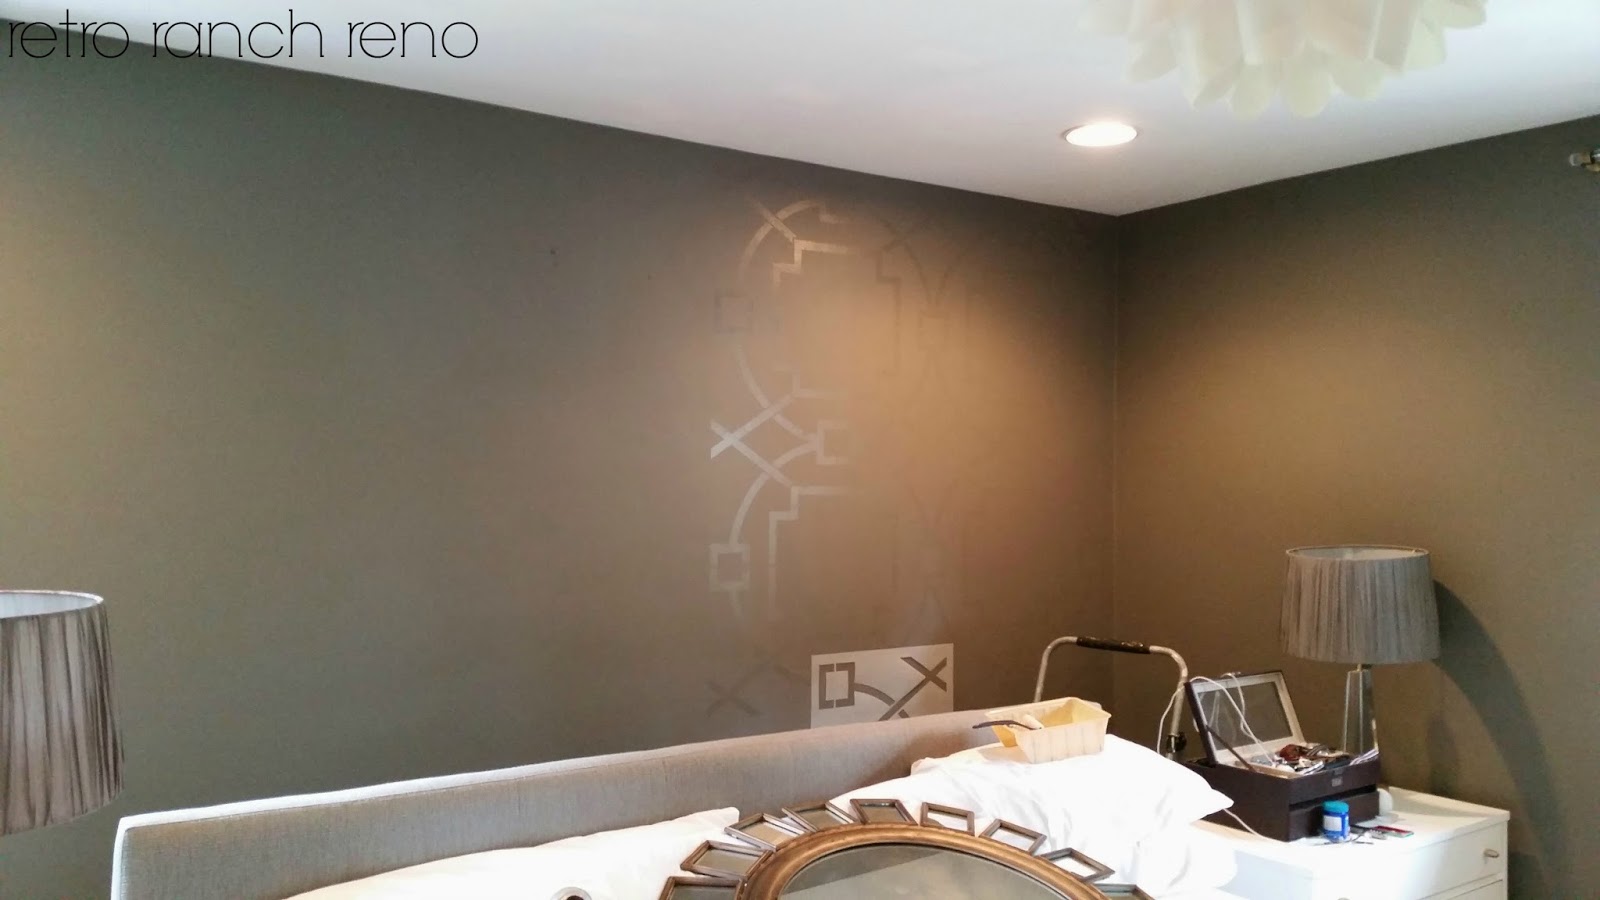
We started here.
(Those super cool wall decals are from the amazing Julia! You should check out her shop...she's on vacation now, but will be returning soon!)
The decals, mirror and DIY lucite curtain rod came down, and it was time to paint.
I used the same dark gray that I painted the rest of our room (Martha Stewart's Zinc matched to Glidden paint). It took two solid coats to cover.
I liked it when it was done, but I'm not going to lie, I was a little skeptic. I think I was used to having a pop of something...and now there was just a whole lot of gray going on. Gray walls, gray lamps, gray bed frame, gray bench, gray rug. I semi-freaked, but then reminded myself to keep moving forward because I will be swapping a few of those gray items out of the room and I have grand DIY-makeover plans to add in the much needed "pop" that was now lacking in the space.
After the wall was dry I assembled the tools to get my stenciling done. I dug out an amazing stencil I purchased from the very talented Sarah (ummmm, last July!!!), a small container of Minwax's Polycrylic in Gloss, some Krylon spray adhesive, a drop cloth, small paint tray and small foam roller.
In my head, I envisioned this stencil to have a gloss-on-matte, wallpaper-ish effect. The paint I used on my walls was a flat finish and instead of buying another can in a gloss finish, I headed to our basement and grabbed a small container of gloss polycrylic I had on hand. Yay for being cheap thrifty!
After the first pass, I was nervous. Since I was using polycrylic and not paint, the pattern looked AWFUL when it went on. Instead of panicking, I pretended it looked fantastic and continued my second pass with the stencil. Thankfully, by the time I finished the first two passes, things were dry, and the light was bouncing off the glossy design, just as I had hoped. It was a success!!


And here's a peak at the whole wall covered.

I just have a few tiny things to touch up, and then I'll be able to officially cross this project off the "master bedroom refresh" to-do list!!
Anyone else have a mid-way project freak-out?! Did it turn out okay in the end??
I love it!!
ReplyDeleteThanks Sada! :)
DeleteOh, I can't wait to see it all done! Loving it!
ReplyDeleteThanks Emily....I can't wait to share it! :)
DeleteYAY!! Looks SO good! :)
ReplyDeleteAw, thanks Sarah!! :)
DeleteI love this so so much. The gloss on matte is now something that's in my head. You rocked this idea. So clever.
ReplyDeleteThank you so much, Kim!! Xo! :)
Deleteoooh i love the subtlety!!! looking good!
ReplyDeleteThanks Cassie! :)
DeleteIt looks fabulous. Love how subtle the shine is. Perfect!!
ReplyDeleteThanks so much, Katja! :)
DeleteIt's looking good, how come I've never heard of using polycrylic like this before? Next time I stencil a wall I will have to try this out. The gray with the gold accents is going to look awesome, can't wait to see it come together.
ReplyDeleteI've never heard of it either, but I figured I could give it a shot since I had the materials on hand. I'm glad it worked out...phew!! Thanks Kristel!! :)
DeleteI love the gloss on matte look so much!! You did an amazing job! I've always wanted to tackle a stenciling job but just scared lol
ReplyDeleteThanks so much, Cindy!! Girl, don't be scared! If I can do it, so can you! :)
DeleteThat is such a beautiful technique! Love how the pattern is so subtle, yet it's totally there and makes a statement!
ReplyDeleteThank you so much, Jennifer!! :)
DeleteThis is beautiful!
ReplyDeleteThanks Nikki!! :)
Deletegood job Gabbi! I like your idea of using what you have too. I want to stencil our bedroom wall so bad. This might be the way to go!
ReplyDeleteThanks Trina!! Doooo it! :)
DeleteThis looks so so good Gabbi! I would have never thought to use polycrylic instead of gloss paint, genius!
ReplyDeleteAw, thanks Bethany! I'm so glad it worked out...I was nervous after the first pass...phew!! :)
DeleteLove!!! And yes, I've had many mid-project freak outs...almost every one has a "messy middle" where I doubt my decisions, but it usually comes together in the end.
ReplyDeleteThank you, Victoria!! I'm glad I'm not the only one! ;)
Deletegreat idea! The way the light hits the wall + stencil reminds me of wall paper - such great thinking using poly
ReplyDeleteThanks Katrina!! :)
DeleteLove the shine! Such a clever idea!
ReplyDeleteThanks Ashley! :)
DeleteLoving this! It's such a subtle + sexy detail!!!
ReplyDeleteAw, thanks Jenn! :)
DeleteThis is amazing!
ReplyDeleteThanks Nadoush! :)
DeleteOoooh pretty:) love the contrast in textures:)
ReplyDeleteThanks so much, Shavonda!! :)
DeleteI love. I really want to redo my master bedroom! I last about a year with the same stuff and then I get antsy. This is beautiful!
ReplyDeleteI hear you...I always want to switch things up! I like keeping it fresh! ;) Thanks so much, Jen! :)
DeleteHello - love your blog! I am re-doing my daughter's room and am wondering about the fan. Is that a cover or accessory that you added to the ceiling fan? We need to keep her fan but she would love the look of a chandelier. Thanks so much!
ReplyDeleteSorry for the late reply, Stacy! The light/fan combo was actually purchased that way. It's from Lamps Plus...you can find it here: http://www.lampsplus.com/products/52-inch-casa-optima-white-flower-ceiling-fan__86646-32431-k9774.html?cm_mmc=CHIG-SH-_-CI%20General-_-General-_-86646-32431-k9774&sourceid=DFCHIG86646-32431-k9774&kpid=86646-32431-k9774&gclid=CI24uePEmMICFfPm7Aod7ScAcA
DeleteEsto resultó hermoso. He visto el truco con vinilos decorativos, pero nunca hubiera pensado para usarlo con pintura y plantilla. Gracias por compartir tan gran idea!
ReplyDelete