Once our walls went dark, I really fell out-of-love with our large leaner mirror. It blended in with the walls and didn't provide any pop.
I solved that problem the same way I solve 90% of my other problems....with some leftover paint!!
For our master bedroom refresh, I knew I didn't want to completely rid our room of my signature teal color, so rather than have an accent wall covered in Behr's Balmy Seas, I wanted to incorporate it using accessories and accents. That gorgeous shade of teal would be the perfect hue to make our old mirror come to life again.
I took it outside, spray primed and painted it with a leftover paint sample.
Once that was done I got out my Citri-Strip gel, coated the over-spray and used a scraper to clear the mirror surface. (Yes, I was lazy and didn't want to cover and tape before I primed, so I had to strip later.) After that, I used Minwax's polycrylic in semi-gloss to cover and protect the paint.
And voilĂ ...a new mirror!
I think it looks great against our dark walls, and all dressed up for the holidays... ;)
Can't wait to share more details soon!!!
Showing posts with label Behr Balmy Seas. Show all posts
Wednesday, February 11, 2015
Wednesday, August 6, 2014
Accent Wall Sneak Peek!
Alternate post titles....1) a bunch of pictures that are so far from being Pinterest-worthy or 2) real-time, real-life makeover....
A few posts back I mentioned I was in the middle of making over our bedroom for the millionth time. I showed off our TV gallery wall that was (ahem, I mean is) 99.9% complete and I'm here to share another project for that room that isn't quite finished...but it's oh-so-close!
This was a project that both scared and excited me. It's been floating around in my head for a very long time (for real...this makeover has been underway, mostly in my head, for almost a year), but I kept going back-and-forth on it. Going forward would mean painting over my beloved Balmy Seas and tackling a stencil project on top of that. {You would think I'd be sick of stenciling after this, this and this...but nope, I'm still smitten with the results.}
I realize I was hemming and hawing over something that was just paint, and if it didn't work out, I could just get more beautiful blue-green paint, sand down the stencil and repaint my wall, AGAIN...but to be honest, the thought of putting all that work into something I could totally hate didn't sound like fun. Time is so precious, and I have about one million other DIY projects to tackle! ;)
So I put the project off for months, but it never disappeared from my thoughts. I took that as a sign to stop being scared and lazy. I needed to get the idea out of my head and onto the wall to see if I would actually like it.
Spoiler alert, I didn't like it, I loooved it! And thankfully, hubby did too.
We started here.
(Those super cool wall decals are from the amazing Julia! You should check out her shop...she's on vacation now, but will be returning soon!)
The decals, mirror and DIY lucite curtain rod came down, and it was time to paint.
I used the same dark gray that I painted the rest of our room (Martha Stewart's Zinc matched to Glidden paint). It took two solid coats to cover.
I liked it when it was done, but I'm not going to lie, I was a little skeptic. I think I was used to having a pop of something...and now there was just a whole lot of gray going on. Gray walls, gray lamps, gray bed frame, gray bench, gray rug. I semi-freaked, but then reminded myself to keep moving forward because I will be swapping a few of those gray items out of the room and I have grand DIY-makeover plans to add in the much needed "pop" that was now lacking in the space.
After the wall was dry I assembled the tools to get my stenciling done. I dug out an amazing stencil I purchased from the very talented Sarah (ummmm, last July!!!), a small container of Minwax's Polycrylic in Gloss, some Krylon spray adhesive, a drop cloth, small paint tray and small foam roller.
In my head, I envisioned this stencil to have a gloss-on-matte, wallpaper-ish effect. The paint I used on my walls was a flat finish and instead of buying another can in a gloss finish, I headed to our basement and grabbed a small container of gloss polycrylic I had on hand. Yay for being cheap thrifty!
After the first pass, I was nervous. Since I was using polycrylic and not paint, the pattern looked AWFUL when it went on. Instead of panicking, I pretended it looked fantastic and continued my second pass with the stencil. Thankfully, by the time I finished the first two passes, things were dry, and the light was bouncing off the glossy design, just as I had hoped. It was a success!!
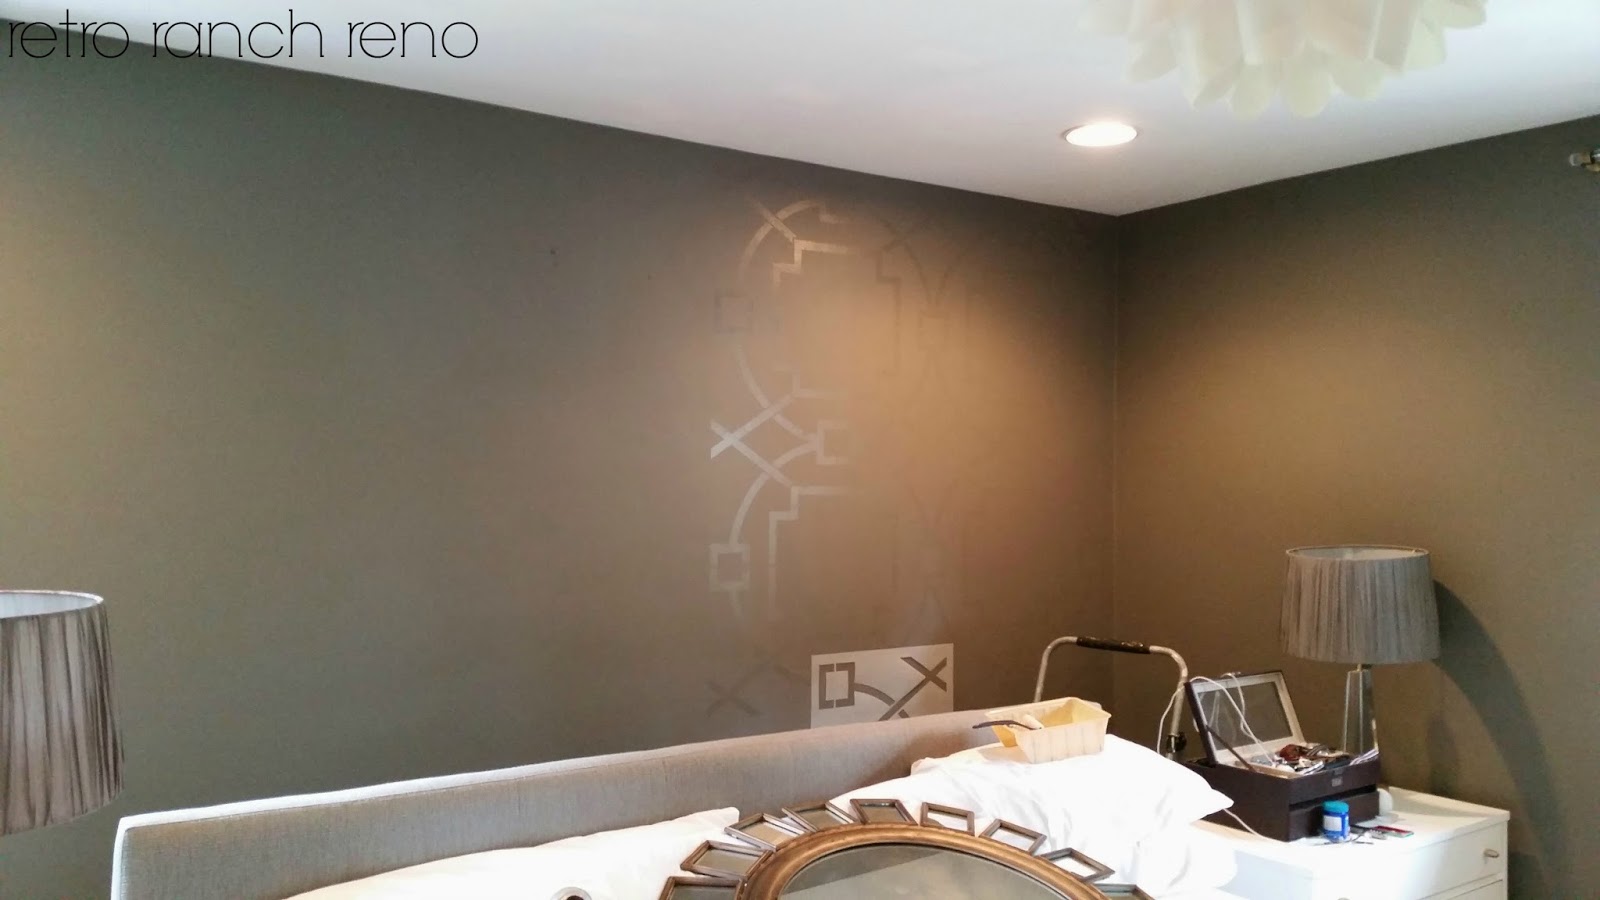
And here's a peak at the whole wall covered.
I just have a few tiny things to touch up, and then I'll be able to officially cross this project off the "master bedroom refresh" to-do list!!
Anyone else have a mid-way project freak-out?! Did it turn out okay in the end??
Wednesday, April 2, 2014
Radiant Orchid Art.
Lately I've been on a bit of a painting kick. Something about spring's arrival has compelled me to bust out my paint brushes and some fresh new colors to liven up our home.
I was inspired to create my latest abstract piece when a good blog friend challenged a few of us to tackle a DIY project using Pantone's Color of the Year, Radiant Orchid. I have seen mixed reviews regarding this color, but I have to admit, I'm a fan. I think it adds a nice pop when I pair it with my favorite tried and true blue hue.
I did a little research to see which colors were deemed orchid-y enough and came across several awesome options in this post. The winner for me, though, was Behr's Orchid Kiss. After seeing it in Alex's home tour, I was sold.
I headed to Home Depot to pick up a sample, and while I was there, I fell in love with a combo of three colors....Behr's Pale Orchid, Behr's Orchid Kiss and Behr's Balmy Seas {the same color as the accent wall in our master bedroom.}
Once I had my colors home, it was time to get to work.
I found a scrap piece of birch wood laying around in my craft stash and I painted it white for a base. Then I pretended I had painting skills and started adding color to my "canvas". I kept a separate brush for each color and just added a few lines of the first color, then the second color and then the third. I repeated that process over and over until the coverage felt right. After that, it was time for some shine. Lord knows I can't finish a project without involving gold in some way, shape or form. ;) So I pulled out a fourth paint brush and layered in some metallic on top of a few already painted areas.
Now, clearly I am no artist...but for just a few bucks {seriously....the paint samples were about $3 a piece} and a small amount of time, I was able to hop on board with a major trend of the year. Plus, it may have inspired a possible room refresh in the near future! ;)
Now head over to check out the crazy talented ladies who took on the Radiant Orchid challenge with me!
![]() |
From top left moving clockwise:
1. Flower Pots from Dimples and Tangles 2. Secretary Desk from Cuckoo4Design 3. Abstract Art from Retro Ranch Renovation 4. Wallpapered Powder Room from The Chronicles of Home 5. Painted Tray from Dwellings by Devore 6. Cross Stitched Jewelry Organizer from Primitive and Proper
How do you guys feel about Radiant Orchid? Do you give it the thumbs up or thumbs down?!
|
Subscribe to:
Posts (Atom)


