Showing posts with label hallway. Show all posts

Friday, May 15, 2015

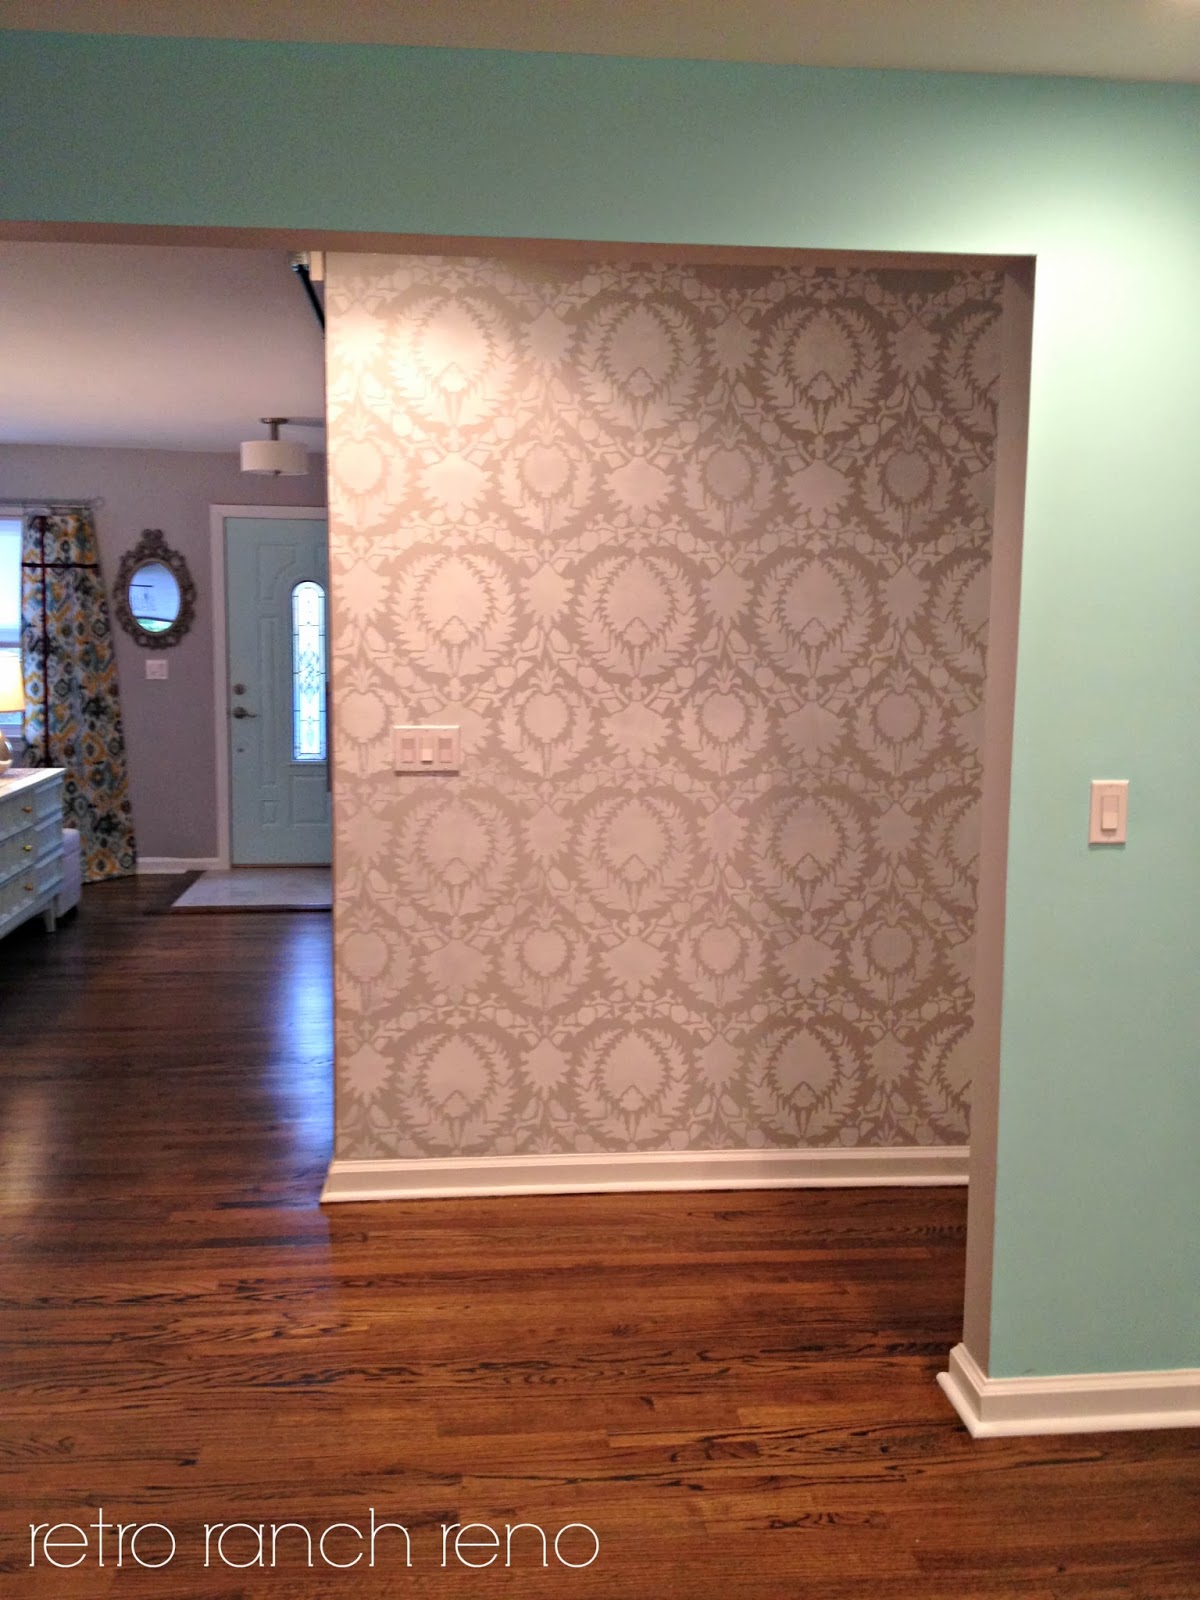
Our Rancher: Before & After - The Hallway.

I'm sure some of you are thinking that a hallway does not deserve it's own "before and after" post...especially in our humble ranch.  In many homes, they are merely a walkway to get from point A to point B.  And while that is true, our view has changed quite a bit from when we signed on the dotted line.

Removing a few walls, adding some pot lights and a stencil (or two) has definitely improved our modest hall.  I still have manyyy picture frames to hang here before I can call this "complete", but it's getting there.


Not too bad, huh?  I can't wait to share our guest bedrooms and bath!

And catch up on the rest of the "then and now" series with these links...the intropart onetwothreefour and five!

Tuesday, April 21, 2015

One Frame Down...


Those of you that have been around here a while (thank you, love you!!!), you know our hallway has gone through a bit of an evolution.  I tackled my first stencil project on those walls...


Not long after they went up, I realized I wanted something more.  I decided to hang a few mini-galleries on each wall. 


I liked it, but I wasn't satisfied.  I wanted something a little bold...something that made more of a statement.  So I did what any insane person would do...I removed all the frames (don’t worry, I only hang stuff with 3M picture hanging strips), rolled over the hours of stenciling I had originally done and started stenciling, again.


I’m 99.9% certain my hubby thought I was nuts, but I had a picture in my head I just couldn’t shake.  

After a veryyyyy long day, I had the results I wanted all along!  I was smitten.


...except for the fact that I had to re-hang. all. of. those. frames.

UGH.  I, legit, loathe hanging things.  I really don’t know why I hate it so much, but I do.  It’s one of my least favorite things to do...which is evident by the fact that our halls are still bare.  Yup, I re-stenciled well OVER a year ago, and have yet to hang a single frame back up.

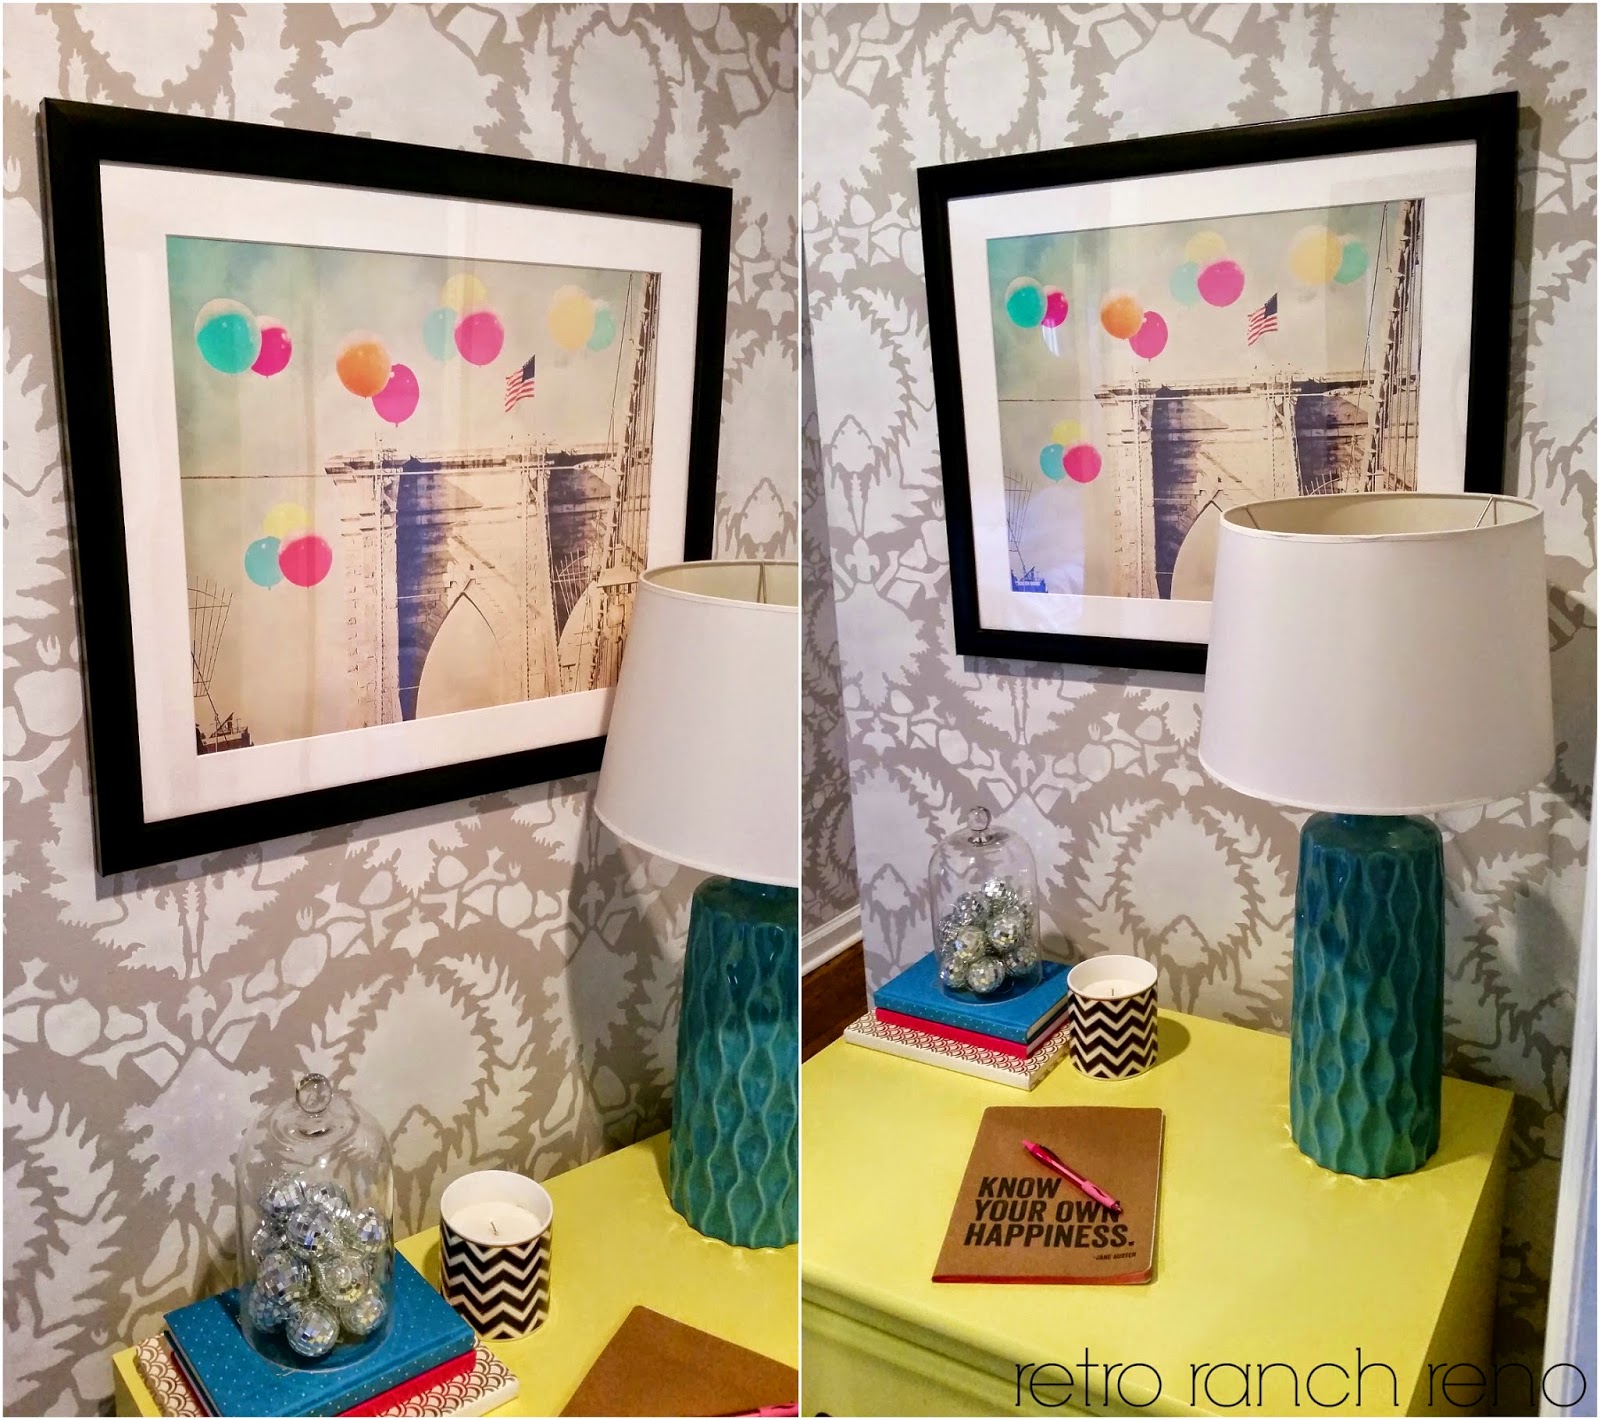
Until now!  Thanks to UncommonGoods reaching out to review one of their products, I quickly found some motivation to hang at least one piece up in our hallway!


UncommonGoods is a super cool company, out of NYC, that supports artists and designers.  Half of what they sell is made by hand and most of it is created right here in the USA!

Their site is super easy to navigate, and allows you to shop by category.  I headed straight to their art page (here) and fell in love the minute I came across this piece, Balloons Over Brooklyn Bridge.


The print looked so good online, and was even better in person!!  It came matted and mounted on matboard. All I had to do was pop it into my frame and hang!


Like their name suggests, UG sells many interesting and unique gifts.  Mother's Day is just around the corner and they have a page dedicated to buying gifts for her that you can check out here. If you want to make sure you're mom's favorite, then click here to get her something good! ;)
_______________________________________________________________________

Thank you UncommonGoods for providing me with the art for this post.  All opinions are 100% honest and my own!

Friday, November 15, 2013

Evolution of Our Hallway.

For just being a hallway, ours has undergone quite a few changes in the short time we've owned our home. First and most importantly, we knocked down quite a few walls to create our open floor plan.  


Then once that happened, I knew I needed to spice up the blank slate.


I added a stencil...quite a daunting task for a first time stenciler, but boy was it worth it!


Then I added some much needed frames.  I thought that was good, but quickly realized it was still lacking something.


So I decided to add a lot more frames to create four mini-gallery walls.  I now realize I only showed off the first gallery that went up...and after that I lost steam on the project.  The frames were up for quite some time, but I never got around to filling them with meaningful art, words and photos.  {Please tell me I'm not the only one who moves slower than molasses at that task!!}


After my gallery walls were up, I surely thought our hallway was almost done.  I just needed to fill the frames find the perfect mirror to hang where my current "place-holder" mirror is.  Ohhhh, if only that was the case. ;)

To be perfectly honest, I just wasn't feeling the pattern I put up in the hallway anymore.  Don't get me wrong...I really did love it when it first went up!  At that point in time, it felt like a big risk to put a pattern up over our entire hallway.  I loved the extra something it added, but as time passed, I realized it wasn't enough for me.  My style is constantly evolving, and along with that evolution, I seem to gain courage to take more risks and try new things.

I was craving more.  I wanted a bold statement in our hallway, and after seeing YHL paint their floor, I knew the exact pattern I was searching for...Royal Design Studio's Suzani Silk Road.  

I placed my order the same day YHL's post went live, and I couldn't wait to paint over our stenciled hallway to give me a fresh new canvas.  Who would have everrrr thought I'd say I was happy to paint over something that took me 9 hours to complete?!  Certainly not this girl!!!

Shockingly, I didn't cringe on bit as I covered up the pattern.  {FYI...if I wasn't putting such a busy pattern over my previous stencil, I would have sanded the walls down before painting over it to make sure everything was smooth and there was no trace of the stencil left.  I took a risk not doing this, but I figured my bold pattern would be forgiving...and it was, phew!!!}  It took two coats to cover {mostly because I used a semi-gloss white paint for my stencil the first time around, but soon I was ready for my new pattern to go up!


I stuck with Behr's Gentle Rain as the base coat color for the hallway.  It's the same color we have in our living/dining great room, and it reads as a "true" gray on the walls in our house.  I used Behr's off-the-shelf ultra white paint in a flat finish for the stencil.  This stencil was quite time consuming and took twice as long as the first stencil I used.  The main reason for the added time was that I could cover the entire wall {top to bottom} with two passes of the first stencil since I bought it in the "professional" size.  This stencil took 4.5 passes because of it's size, and that meant I needed to wash my stencil twice because of the paint build up. Grrrrrrrr.....

Yes, my stencil got a bubble bath {with hot-ish water and dish soap}...which was quite effective in removing the paint and keeping all of the tiny pieces from bending out of shape. :)


This hallway project was quite the task to take on {I completed it during two days off from work}, but just like my first experience...the results were SO worth it!!!  I cannot wait to get some frames back up and complete this hallway! :)


Happy Friday, friends!  I hope you all have a great weekend! :)


Monday, March 25, 2013

While the Mud Dried...

This weekend was all about mending fences cracks in our fireplace wall.  Unfortunately, it was an-ever-so-slow process {the joint compound I used said to wait 24 hours between coats...bleh}, so I was forced to take on another project to occupy my time.

Lucky for me, when I was cleaning out our 2nd guest bedroom...aka the place where I store all my craft/project crap...I created two big piles of frames.  What the heck could a blogger do with a superfluous amount of frames?!?!  Create the very first gallery wall, EVER, in Internet history!!! ;)

For those of you who are over gallery walls...my apologies.  Please just avert your eyes, and wait for my next post about crack{s}.

I previously hung a mini-me gallery wall in our dining room, but I quickly swapped that out for some DIY picture ledges.  Since I didn’t want another cluster of frames in our very open living/dining room, I figured our hallway would be a great place to experiment, a la YHL.

We already have a few frames up in there.  They helped to fill the blank wall space, and they also sorta-kinda-maybe helped to camouflage our ugly thermostat.  I liked the look, but it didn’t knock my socks off.  I’ll be the first to admit...rarely do I get things “right” on the first try, if ever.  And even if I happen to nail it, I’m usually switching things up down the road.  It’s just how I am.  I like to tweak and make things fresh.  {Although I know a few of you are rolling your eyes, thinking...ummmm, gallery walls aren’t “fresh”.  I know, I know...but they are for my little hallway, so just pretend that this is a wonderful, albeit, not-brand-new idea.}

Technically, I have four walls to fill in our hallway.  {The spaces are broken up by alcoves to linen closets, a bathroom and a bedroom.}  I wanted to begin with the wall we’d see the most...the one visible from the kitchen.

I started by removing the two frames that were previously up, and I had all the other frames/things to hang in piles around me.  I just put things together like a puzzle until I liked what I saw.  Helpful tip {for me at least}: take a  picture of everthing once you settle on a layout.  It will help greatly when you are standing there wondering if you had that frame horizontally or vertically, etc. You'll be suprised at how quickly you forget...or maybe that's just me.


Then I took out some left over rosin paper from when we covered up our newly re-finished hardwoods.  I took each frame from the group, traced it and cut it out so I had a paper representation of it.


Once all the pieces were cut out, I taped them up on my wall.  I wanted to get the height, spacing and layout on the actual wall itself without any commitment.


I called the hubby over to see if he approved {because you know I wouldn’t have gone a step further if he didn’t like it ;) hehe}, and I got a big thumbs up.

That’s when I busted out my trusty 3M picture hanging strips and got down to business.  These things are amazingggg.  They are literally holding up everything in our house that they can.  Depending on the size and weight of your frame, you just stick the size and number of strips you need on the back of your frame...then when you are ready to hang them, peel the other side off...stick to the wall.  Press for 30 seconds, and voila!  You have a picture hung without any holes in the wall.

Of course, after you stick the frame to the wall for 30 seconds, you should remove the picture frame for 1 hour...and then put it back.  I may {or may not} have followed that rule, but they do tell you to do it that way in the instructions. ;)

One by one, I removed one “paper” frame and replaced it with a real one.  I used my level app on my iPhone to make sure things were pretty level, but I also used my stencil on the wall to see if things appeared straight.  {Old houses never have level walls.  I’d rather the frames seem level with my stencil pattern and wall, than level with...well, the Earth.}

Here's an picture from my last hanging experience to demonstrate my leveling abilities.


In no time, I went from this...


...to this!


That leaves me with three more walls to go.  Oh, and I also need to put some actual pictures, fabric, quotes, pretty paper, etc. in the frames.  Who wants to bet that I’ll be done with this project before the fall?!?!

PS-This post was not sponsored by 3M...I just religiously use their products to hang anything in my house that I can.  I've had nothing but success with them, so I wanted to pass along the tip to my awesome readers!

Wednesday, December 19, 2012

Wild Weekend.

How is Christmas only a week away?!?!?  I feel like December flew by in a flash.  And because time is just slipping away, I knew I had to take on a few nagging projects this past weekend, otherwise they wouldn’t be done until at least mid-January {but probably February if I’m being honest ;)}.

So I put my productive pants on Saturday morning and got to work.  The first thing I tackled was painting a sign for a dear bloggy friend who kindly asked for one after I posted about my cheap art for our bedroom.


Then I was determined to get some frames hung up in our hallway.  From the get-go, our hallway lacked a bit of appeal.  It was just b-o-r-i-n-g, and due to our open floor plan, you could see quite a bit of it from many areas of the house.  I tried to amp it up a bit by adding a stencil, and while it worked, I felt like it still lacked a lil' something...especially since our thermostat stuck our like a sore thumb in that space.


My solution?  Add a couple frames to the walls...and since it's Christmas time, add some free, festive printables.  I found some cute ones online, uploaded them to CVS, sized them to fit my 5 x 7 frames and picked them up the very same day.  I even had them in their frames weeks ago, I just never got around to hanging all of them.

Some were quick and easy...because I was putting them in frames already on the walls.  They went up when the rest of our Christmas decor went up.


All of the others just sat in our living room for quite some time. 


What can I say…I absolutely DESPISE hanging things.  I’m actually surprised I hung them before Christmas passed us by.  Especially since it took me months just to hang this tiny gallery wall.

Using 3M command strips and my iPhone level definitely helped to make the process much easier...on both me and my walls.


I’m super pleased with the outcome!  Now you barely notice the camouflaged thermostat.


Okay, so that’s a complete lie…but I’m going to pretend that it helps to take away from how it was all in-yo’-face before.

So after all that fun, I decided to take my efforts to South Beach our master bedroom.  I have been dying to re-arrange our bedroom for a while.  We started out here, with old furniture and not the right paint color.  Then I brought in our Craigslisted makeovers, painted the walls for the 2nd time and switched up the layout.  Well, it was time to change things again….because I was never 100% sold on how we set things up. 

Needless to say, this went down on Saturday night…


What?  Making over a room isn’t your idea of a wild Saturday night???  Well it is in this house! ;) {Kidding.  Sort of.}

Stay tuned for our bedroom changes, and even some master bath stenciling!  Woot woot!!