Tuesday, November 27, 2012

Turkey Day Tablescape

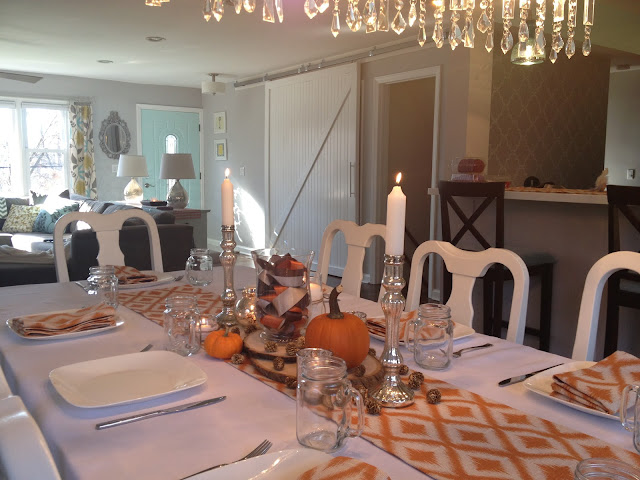
For most {including myself}, Thanksgiving is a distant memory.  The turkey-induced coma is a thing of the past, and many are much more focused on all things merry and bright.  But before I can fully wipe Thanksgiving from my blog-o-sphere, I have to do a little show and tell about my turkey day table.  As I mentioned earlier, this was the first time I was hosting.  I was super nervous that I’d screw something up...so if all else failed, I was hoping to have a pretty table to distract my guests from any food that might be less than desirable. ;)

I had a vision in my head of what I wanted our table to look like, but I was striking out left and right when it came to finding tablecloths and cloth napkins.  For a hot second, I considered ordering something off Etsy...but before I took the plunge, I ventured out to a fabric store that opened up near our house.  I hit the jackpot!  I spent my entire lunch hour strolling through the store one afternoon and found a cute fabric I wanted to use.  I wasn’t sold on an entire tablecloth of it, but I thought a runner and napkins would be perfect.  For my tablecloth, I bought a plain white one at Target for $17.99.  It was too long and too wide, but nothing a little sewing couldn’t fix.

All ready to trim off the excess...


After that was done, my mom and I got to work on the fabric runner and napkins.  We both ended up liking the reverse side of the fabric more than the “right” side of the fabric...so we went with it.  {The underside of the fabric is showing in the bottom of the picture to the right.}


After a ton of sewing, I was ready to put together a bunch of odds and ends to make the “centerpiece” of the table.  I used some things I already had on hand {votives, various hurricanes, candles, lace, jute cord, pumpkins} and supplemented it with some cute stuff from Michael’s {candle sticks, wood slices, more votives, ribbon, pine cones, etc.}.

To dress some of the glassware up, I added lace and jute cord...and the rest of the stuff I just moved around until I was happy with how it looked from all angles.  I have to say, I was pretty pleased with how it turned out.


About 90% of the way through...I realized I didn't have the mason jar glasses on the table. :(  And then a rogue napkin went missing...so just pretend it's there in these last two photos. :)


Anyone else put together a fun Thanksgiving table?

And because I kinda DIY’ed our décor, I’m totally linking up with the ladies of the Dare to DIY (Entertain) Link Party!!  Check out Michelle, Kim, Chelsea and Rachel’s amazing blogs for more details! :)


PS-Obviouslyyyyy, our turkey day table was disassembled, just as quickly as it was assembled, to make way for our Christmas Wonderland.  We started decorating on Friday and Saturday, and I’m hoping we’ll be ready to share everything ASAP!!

Tuesday, November 20, 2012

Banner Letdown.

Back in September I was bitten by the banner bug.  I couldn't help it.  I came across some unorthodox fall fabrics and couldn't fight the urge to turn them into a "thankful" banner to hang across our mantle.

I started by cutting out some letters that I printed out on computer paper.  I had the entire alphabet printed out and filed away from when I made a banner for my sister-in-law's baby shower.


Then I taped the letters down to some brown felt that was also left over from my prior banner.  {Taping the edges down allows for much easier cutting.}


I cut out enough letters to spell out "be thankful", but I scrapped the "be" and just went with "thankful" due to the length of all the letters together.  {Ignore the cup rings on the tray...I will be re-finishing it soon.}


With the letters completed, I turned my efforts to the pennant part of the banner.  I used another stencil I previously printed out.  I taped that down too and then cut out all of my flags.


After all of that...it was time to glue.  I pulled out my Tacky Glue and used a couple drops on each letter to glue the felt to the fabric.


Then I searched in my supplies for some left over brown ribbon to hold everything together.  I cut the ribbon to size and glued the flags to the ribbon.


Once everything was dry, I hung it in place...


...and was immediately disappointed.  Hubby really liked it, but I wasn't sold.  I kept it up for a week or two hoping it'd grow on me, but I just wasn't a fan.  Fortunately I did like the hounds tooth fabric as a runner on our console table.

Here it is looking all spiffy with some new owl friends.


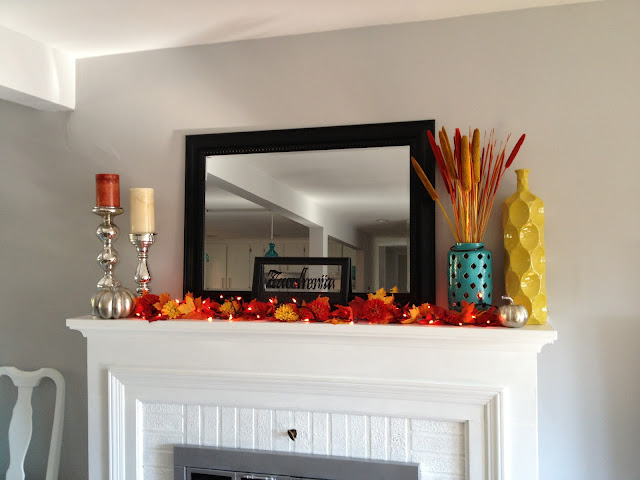
And here is what our mantle has been looking like for most of the fall...sans banner. :-/


Even though the banner was a fail, I'm still happy I tried it out...especially since it allowed me to take part in the Dare to DIY (Be Thankful) Link Party that is being hosted by the amazing Michelle, Kim, Chelsea and Rachel!


Maybe I'll have more success with a Christmas banner.  And at least this party got my butt moving to show off our fall mantle before I switch it out for all things mistletoe come this weekend! ;)

Monday, November 19, 2012

DIY Mason Jar Soap Dispenser

This is a big week people.  It’s Thanksgiving!  That means I’m allowed to stuff my face until I can’t move and no one can judge me for it!  {That reminds me...I need to make a mental note to give thanks for stretchy, forgiving pants.}  It also means that I crossed some nagging DIY and organizational projects off my to-do list this weekend…mostly because I am preparing to host Thanksgiving for the FIRST TIME EVER.  You should have seen me!  I was a lean, mean, productive queen.  Kitchen cabinets...cleaned out and organized.  Linen closets...cleaned out and organized.  Basement {thanks to hubby}...cleaned out and organized.  Guest {junk} bedroom #2...cleaned out and organized.  Heck, I even managed to do the laundry and get grocery shopping done.  And even more fun than that, I was able to complete a DIY project that I’ve been meaning to do for about ohhhh, probably 9 months.

Since I’ll be spending a whole lot of the holiday in the kitchen, I figured it was high time that I switched out my ugly, plastic soap dispenser for a cute DIY mason jar one.  My method to do so may not have been the smartest or most professional, but it worked.  And in my book, that is pretty much the only thing that counts.  {Aka, don’t judge the stupid way I went about accomplishing this project.  K thanks.}

So I started out with these two things...a cute little mason jar from Michael’s and my ugly, old soap container that was sitting next to my kitchen sink. {FYI...I have many antique mason jars that I originally wanted to use for this project, but because they were much taller than my plastic soap dispensers, the straw piece from the dispensers wouldn't reach the bottom of the jar.  You could probably swap out the straw piece for something longer if you wanted to use an older, larger mason jar, but I actually like the size I used.  It's the perfect size to sit by the sink.}


I started by using a sharp knife {reference my comment above...don’t judge...I still have all my fingers in tact people}, and literally just sawed through the top of my soap dispenser.  It didn’t take too long, but I went slow and steady making sure to keep all my fingers away from the knife.


Then I used a tape measure to help me mark off the center point of the mason jar lid.  {I pretty much eyeballed it because I knew it wouldn’t be perfect once I started drilling.}


I got out my Ryobi drill and used the largest drill bit I had in my possession...which was ¾ inch.  While drilling, make sure to hold the jar tight (I used my knees since I was sitting on the ground) and keep your hands steady because it’ll want to kick out at first.


Once the hole was formed, I tried to fit the top of the soap dispenser through...knowing it wouldn’t work yet.  I again eyeballed to see how much more of the lid I still had to remove.  It wasn’t too much more, so I got out hubby’s wire cutters, and clipped pieces of the metal off until I could fit the top of the soap dispenser through.  It’s best to take off little pieces each time and try to fit the dispenser through quite often.  You can always take more off, but you can’t put metal back on {obviously}.


Once I could pop the plastic dispenser through, I thought I was golden!  Butttttt, I was wrong.  Since I left most of the top on when I cut through the dispenser, there was a little bit of an overhang that was getting caught then I tried to close the mason jar. 


Thankfully, this was an easy problem to solve.  I simply took the wire cutters and clipped off the edges of the dispenser.


Once that was done, everything was a perfect fit.  I screwed the pump part of the dispenser onto the part I had been working with...


...and then I screwed the lid onto the jar.  IT WORKED!!


I poured some of my soap refill into the jar and all was finally right in my dispenser world.