Tuesday, March 26, 2013

Great Reads Feature

Anyone looking for a great way to liven up your Tuesday?  Perfect, I thought so!

Head on over and check out Kristin of Bliss At Home.


Every week she does a "Great Reads" post where she spotlights new blogs for her readers to check out.  Last week, I was lucky enough to be featured by her.


Today she's doing a round-up of all the Great Reads she talked about in 2013, and in her other posts you can find her talking about all things DIY, home decor and even lifestyle! :)

Monday, March 25, 2013

While the Mud Dried...

This weekend was all about mending fences cracks in our fireplace wall.  Unfortunately, it was an-ever-so-slow process {the joint compound I used said to wait 24 hours between coats...bleh}, so I was forced to take on another project to occupy my time.

Lucky for me, when I was cleaning out our 2nd guest bedroom...aka the place where I store all my craft/project crap...I created two big piles of frames.  What the heck could a blogger do with a superfluous amount of frames?!?!  Create the very first gallery wall, EVER, in Internet history!!! ;)

For those of you who are over gallery walls...my apologies.  Please just avert your eyes, and wait for my next post about crack{s}.

I previously hung a mini-me gallery wall in our dining room, but I quickly swapped that out for some DIY picture ledges.  Since I didn’t want another cluster of frames in our very open living/dining room, I figured our hallway would be a great place to experiment, a la YHL.

We already have a few frames up in there.  They helped to fill the blank wall space, and they also sorta-kinda-maybe helped to camouflage our ugly thermostat.  I liked the look, but it didn’t knock my socks off.  I’ll be the first to admit...rarely do I get things “right” on the first try, if ever.  And even if I happen to nail it, I’m usually switching things up down the road.  It’s just how I am.  I like to tweak and make things fresh.  {Although I know a few of you are rolling your eyes, thinking...ummmm, gallery walls aren’t “fresh”.  I know, I know...but they are for my little hallway, so just pretend that this is a wonderful, albeit, not-brand-new idea.}

Technically, I have four walls to fill in our hallway.  {The spaces are broken up by alcoves to linen closets, a bathroom and a bedroom.}  I wanted to begin with the wall we’d see the most...the one visible from the kitchen.

I started by removing the two frames that were previously up, and I had all the other frames/things to hang in piles around me.  I just put things together like a puzzle until I liked what I saw.  Helpful tip {for me at least}: take a  picture of everthing once you settle on a layout.  It will help greatly when you are standing there wondering if you had that frame horizontally or vertically, etc. You'll be suprised at how quickly you forget...or maybe that's just me.


Then I took out some left over rosin paper from when we covered up our newly re-finished hardwoods.  I took each frame from the group, traced it and cut it out so I had a paper representation of it.


Once all the pieces were cut out, I taped them up on my wall.  I wanted to get the height, spacing and layout on the actual wall itself without any commitment.


I called the hubby over to see if he approved {because you know I wouldn’t have gone a step further if he didn’t like it ;) hehe}, and I got a big thumbs up.

That’s when I busted out my trusty 3M picture hanging strips and got down to business.  These things are amazingggg.  They are literally holding up everything in our house that they can.  Depending on the size and weight of your frame, you just stick the size and number of strips you need on the back of your frame...then when you are ready to hang them, peel the other side off...stick to the wall.  Press for 30 seconds, and voila!  You have a picture hung without any holes in the wall.

Of course, after you stick the frame to the wall for 30 seconds, you should remove the picture frame for 1 hour...and then put it back.  I may {or may not} have followed that rule, but they do tell you to do it that way in the instructions. ;)

One by one, I removed one “paper” frame and replaced it with a real one.  I used my level app on my iPhone to make sure things were pretty level, but I also used my stencil on the wall to see if things appeared straight.  {Old houses never have level walls.  I’d rather the frames seem level with my stencil pattern and wall, than level with...well, the Earth.}

Here's an picture from my last hanging experience to demonstrate my leveling abilities.


In no time, I went from this...


...to this!


That leaves me with three more walls to go.  Oh, and I also need to put some actual pictures, fabric, quotes, pretty paper, etc. in the frames.  Who wants to bet that I’ll be done with this project before the fall?!?!

PS-This post was not sponsored by 3M...I just religiously use their products to hang anything in my house that I can.  I've had nothing but success with them, so I wanted to pass along the tip to my awesome readers!

Friday, March 22, 2013

The Glamorous Life. Not.

In the spirit of keeping things real...here is the non-excitingness around our casa lately.


I have been in the midst of swapping out our wintery decor for something sunshine-y.  I'm trying to force the whole "if you decorate it, spring will come" thing.  That means we have accessories galore, sitting all over the place...just waiting to see if they make the cut or go back into the closet.

On top of that, our "craft room" aka our second guest bedroom has looked like a bomb went off for weeks months now.  I decided it was high time I emptied it {obviously onto our living room/dining room floor} so I could sort through things and organize my project list.

And then there was the electrical work.


You see, back in October, when stupid Sandy left us without power for a week...we decided to invest in a generator.  Then we thought it'd be a great idea to hardwire it to our house.  For that, we'd need an electrician...and unfortunately, it took until this past week to get that electrician to the house.  Of course, while we had him, I figured it'd be a great time to move an outlet and add another.

The hubs and I love to have string lights on our mantel {especially during fall, Christmas, winter...and well pretty much all the time}, so having an ugly cord hanging off the mantel and plugging into the wall just wasn't a cute look.  Plus, if we want to plug things in on the buffet {like when we put Christmas lights on there this past year}, we had to have our plugs hanging off the buffet to the same outlet we plugged the mantel lights into.

Easy, and much more attractive solution?  {Okay...so the solution was only "easy" for us because we just paid to have someone do it.}  1) Add an outlet on the mantel and 2) move the outlet that was showing on our wall, to an area that would be hidden by our buffet.  Woo-to-the-hoooo...no more cords hanging all over the place!

And why haven't I cleaned up and put our furniture back in place?  Well you DO see the horrendous drywall tape bubbled up in the picture near the fireplace don't you?


Yea, that ugly eye sore.  Ugh.

That crack was there when we bought the house.  I asked our contractor to take care of it while they were doing the other major things in our house.  They did, but the tape soon started to pop off the wall.  I'm no expert, but I feel like it has something to do with the fact that we have plaster walls, and sticking drywall tape on there might not have been the best solution.  I hopped on Angie's list to find a professional with a great reputation, and had him come by to give me a free estimate to fix the crack.  He said he'd need to cut that area out, use fiber glass mesh tape, and then patch/sand/patch/sand/patch/sand. 

He also said it's something that may come back every few years because our house is old, and well, has plaster walls.  {The proximity to our fireplace could also have something to do with the crack.  Changes in temperature = expanding and contracting...makes sense to me!}  The repair seemed easy enough, and I thanked him for stopping by...and then I made a list of materials I'd need and went to Home Depot.

I have grand plans of patching this crack {along with a smaller one in our hallway ceiling} myself.  I figure if I screw it up, I'll need to have a professional come in anyway....so why not try it first and see if I can save the $200.

Wish me luck.  I will probably need it. ;)

Wednesday, March 13, 2013

Adding Some Interest.

Our master bath is a place that I barely share with you guys.  I literally had to hunt down the last post I mentioned the space in {which happened to be here}, because I could not remember off the top of my head.  Don't worry, you haven't been missing much.  Since the shower doors went up, there wasn't really much else that happened in there.  I knew it needed some attention in order to feel finished, but other spaces...like our living area or our bedroom...took precedence.

Well a couple weeks ago...wait no, it was months...as in, I did this right before Christmas...I decided to pay some much-needed attention to our bathroom.  It definitely needed "something".  My brain was telling me the answer was a wall full of tile, but my bank account was telling me that a stencil would work just as well. ;)

After conquering my fear of stenciling in our hallway, I was pretty sure I could handle a single wall in our bathroom.  So I hopped online and searched for a pattern that felt right.  I came across Cutting Edge Stencil's Retro Flame all-over stencil and I was sold!  It would be the perfect accent in our bathroom.  And since our 1950's walls are never level, the irregular zig-zags would help to hide any flaws.

Around 10PM on a random Sunday night, I got busy stenciling {like most normal people do}.  I removed the large mirror above our vanity, and hubby's towel holder {after I took the picture}.  I had a blank slate to start with.


I figured that stenciling around the back of the toilet would be the hardest part of this whole process, but I was wrong.  Since I could not figure out how to remove our beautiful light fixture from the wall {I even went so far as to Google the installation manual, with no luck}, I had to work my way around it.  Not the easiest task, but I managed.

In the process, I may or may not have melted part of my stencil onto a light bulb because a piece of it was laying on the fixture as I was diligently working.  {High five to my forehead!}

I used the same method as I did with the hallway.  I sprayed the back of my stencil with some Easy Tack spray adhesive and let it tack up for a couple seconds.  Then I stuck it to the wall and secured the corners with painter's tape {sometimes I didn't even need the tape.}  Then I used a small foam roller to apply the paint to the stencil.  Remember, when you are stenciling, less is more.  The more paint you try to gob on, the more it will bleed under the stencil.  You can "off-load" some paint by rolling your roller onto a paper towel before you paint the wall.

The way I got around the light fixture was cutting my stencil.  Yup, I pretty much knew it'd be a one-time-use for me because of doing this, but I was okay with that.  I knew I needed to chop it up into a couple pieces so I could fit around the light, and it worked.  Unfortunately, it makes the stencil less rigid in certain areas of the pattern, so painters tape came in handy to hold things in place.


It adds a lot more interest, don't you think?  Hopefully I'll get around to giving you guys a full reveal of our {almost} completed master bath that you may have peaked at during our house tour feature last week! :)

Friday, March 8, 2013

Things I Need.

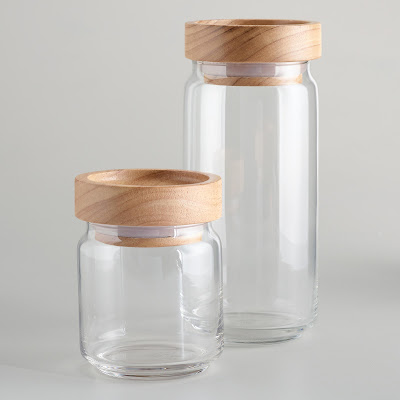
Okay...maybe "need" is too strong of a word to use.  Let me re-phrase...Things World Market Created That Belong In Our Home.  Better?  K great.

The following pretties would be perfect additions to our kitchen...but of course, they are not available online {except for the jars}.  Darn you World Market...such a tease!!


And while this wouldn't be suitable for the kitchen, two of them would look mighty fine flanking the sides of our buffet in the dining room.  Of course, this is available online, but the funds to purchase are not available in our bank account. ;)


And even though we don't have a need for anything pink in our house...I couldn't help but fall in love with this chair.  It almost makes me want to create hot pink accents somewhere just so I can use it. ;)


Anyone else like to "window shop" on the Internet?  Oh the things we could do with unlimited budgets!!  Happy {snowy} Friday everyone! :)

Thursday, March 7, 2013

Dreamy Dwelling Home Tours

A couple weeks ago I was lucky enough to have Aimee from It'sOverflowing ask me to put together a post for her Dreamy Dwelling Home Tour page.

Head on over to her blog to take a peak at the progress we've made on our rancher in a little over a year an a half.  You might even catch a glimpse of our master bath!

Thanks again, Aimee!! :)

Tuesday, March 5, 2013

Canvas Art...Again. For the Last Time. Promise.

A couple weeks ago, I was on a major art kick.  I painted a couple canvases for our bedroom, a wooden sign...also for our bedroom and then some ombre art for the hallway.  Clearly, I was on a mission to fill all of our blank walls.  One art project that I completed and never shared with you guys {I didn't want my beloved readers to OD on my silly art projects} was a set of canvases that call our living room home.  They help to temporarily fill in a blank hole left by the removal of our Christmas tree.  I have more permanent plans to fill the space in the future, but I haven't been able to pick up what I need yet.

So I took the easy route and grabbed some canvases, brushes and paint from the basement and got to work.

I used my favorite colors {blue-greens and greys, obviously}, and mixed in some water as I went along.  It helped me to blend the colors and achieve the look I was going for.


Like my ombre art, I used vinyl letters to put a simple phrase on the piece that is a wonderful reminder to read every day...have faith.


\
And so you can see where some of my latest projects have landed {striped curtains, gold mirror, DIY shelves, wintery mantle}, here is how our living/dining room has looked since we de-Christmas-ified after the holidays.  I love how cozy it's been, but I certainly can't wait to bring back our other curtains and some pops of yellow for the spring!


 Do any of you switch out your curtains for the different seasons?  Am I the only weirdo?  My mom promises me that it used to be a "thing" back in the day. ;)