


Step 1: Buy a piece of MDF from Home Depot.
Step 2: Spray paint it with my favorite spray primer as I was priming a few other projects.
Step 3: After it's dry, let it lean up against your master bedroom wall for over a year while you put the project off.
Step 4: Keep your beloved jewelry in a massive pile on a tray in your bedroom.
Step 5: Get super fed up contending with a jumbled jewelry mess every day.
Step 6: Untangle all your necklaces and sort based on similar styles/lengths.
Step 7: Lay jewelry out on the MDF and play around until you like the placement.
Step 8: Get out tape measure and pretend like you are going to use it.
Step 9: Forget said tape measure and decide to just eyeball the placement. Using a ballpoint pen, mark the spot where you need to drill pilot holes for the cup hooks you will later screw in.
Step 10: Drill pilot holes.
Step 11: Find a leftover gallon of white satin paint in the basement and apply two coats. Allow to dry overnight.
Step 12: Get out your painters tape and start winging a design. Decide you don't need to use a tape measure here either...just your eyeballs and a couple widths of tape will do.
Step 13: Get out the X-Acto knife and remove superfluous pieces of tape in your design.
Step 14: Whine like a big baby because being bent over doing all that taping hurt your back like no other. Then suck it up and paint the white paint over your design to minimize bleed through.
Step 15: Use your favorite gold spray paint to paint to coat your design, the cup hooks, curtain rod bracket and metal strip you will later attach.
Step 16: Remove the painters tape while the paint is fairly wet so nothing rips the paint off.
Step 17: Hate your project because there are paint splatters all over that you didn't notice while spraying, but are VERY obvious now that it's dry. (Note - do not spray paint in the evening light.)
Step 18: Attach cup hooks and hang some necklaces while praying it looks a little better.
Step 18a: That didn't work so attach bracelet bar and earring holder hoping they'll distract from the ugly splatters. Nope, still ugly.
Step 18b: Throw yourself a mini-pity party.
Step 18c: Use the non-tape-measure method and drill more pilot holes into your board because more necklaces hanging = less ugly board showing. You will definitely like the project then. WRONG.
Step 19: Wave the white flag and realize you need to start back at step 12...re-tape/re-cut out your design.
Step 20: Spray paint another coat, or two, of paint over your project...and now fall in love.
Step 21: Remove the tape while the spray paint is still semi-wet.
Step 22: Touch up any small areas where the white paint lifted with the tape.
Step 23: Spray a matte clear coat over the whole board to protect your project that you now love. Also, spray your hooks, curtain rod bracket and metal strip for the earrings.
Step 24: Reattach cup hooks, bracelet bar and earring holder
Step 25: Arrange your jewelry in a way that makes your heart happy, and thank the Lord this project can be crossed off your to-do list!!!
Optional step-
Step 26: Wonder how long it will take you to actually hang it on the wall instead of just leaning it up against the wall.
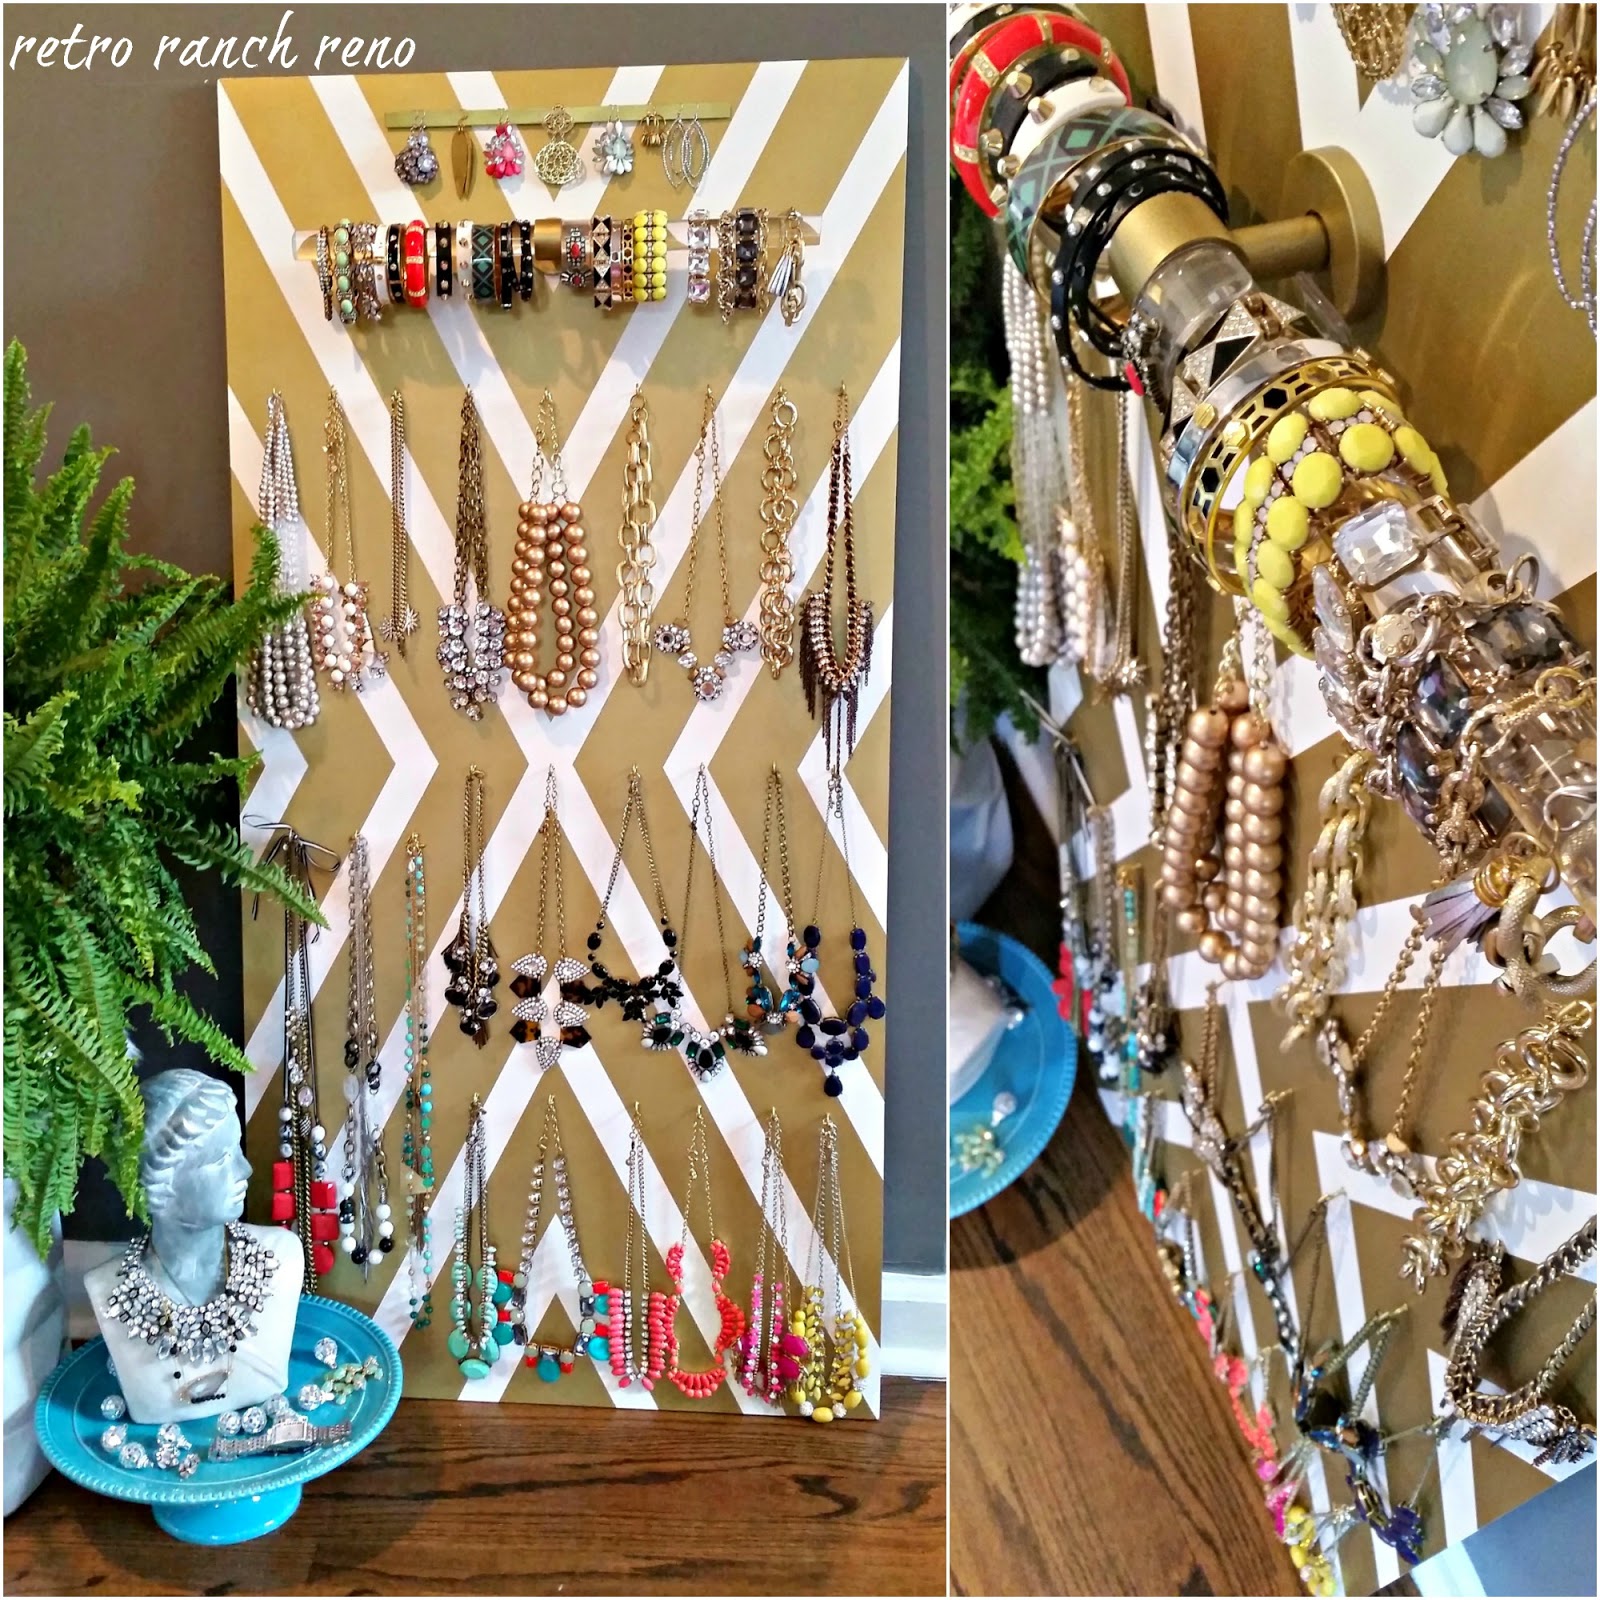
PS-the bracelet bar is made out of left over materials from my DIY lucite curtain rods, and the earring holder is made from a metal strip I picked up at the hardware store. I simply drilled 3 screws halfway into the board, dabbed some gorilla glue onto each screw and positioned the metal strip on top. Then I secured the strip in place with painters tape while the glue dried.


