Showing posts with label frames. Show all posts

Tuesday, April 21, 2015

One Frame Down...


Those of you that have been around here a while (thank you, love you!!!), you know our hallway has gone through a bit of an evolution.  I tackled my first stencil project on those walls...


Not long after they went up, I realized I wanted something more.  I decided to hang a few mini-galleries on each wall. 


I liked it, but I wasn't satisfied.  I wanted something a little bold...something that made more of a statement.  So I did what any insane person would do...I removed all the frames (don’t worry, I only hang stuff with 3M picture hanging strips), rolled over the hours of stenciling I had originally done and started stenciling, again.


I’m 99.9% certain my hubby thought I was nuts, but I had a picture in my head I just couldn’t shake.  

After a veryyyyy long day, I had the results I wanted all along!  I was smitten.


...except for the fact that I had to re-hang. all. of. those. frames.

UGH.  I, legit, loathe hanging things.  I really don’t know why I hate it so much, but I do.  It’s one of my least favorite things to do...which is evident by the fact that our halls are still bare.  Yup, I re-stenciled well OVER a year ago, and have yet to hang a single frame back up.

Until now!  Thanks to UncommonGoods reaching out to review one of their products, I quickly found some motivation to hang at least one piece up in our hallway!


UncommonGoods is a super cool company, out of NYC, that supports artists and designers.  Half of what they sell is made by hand and most of it is created right here in the USA!

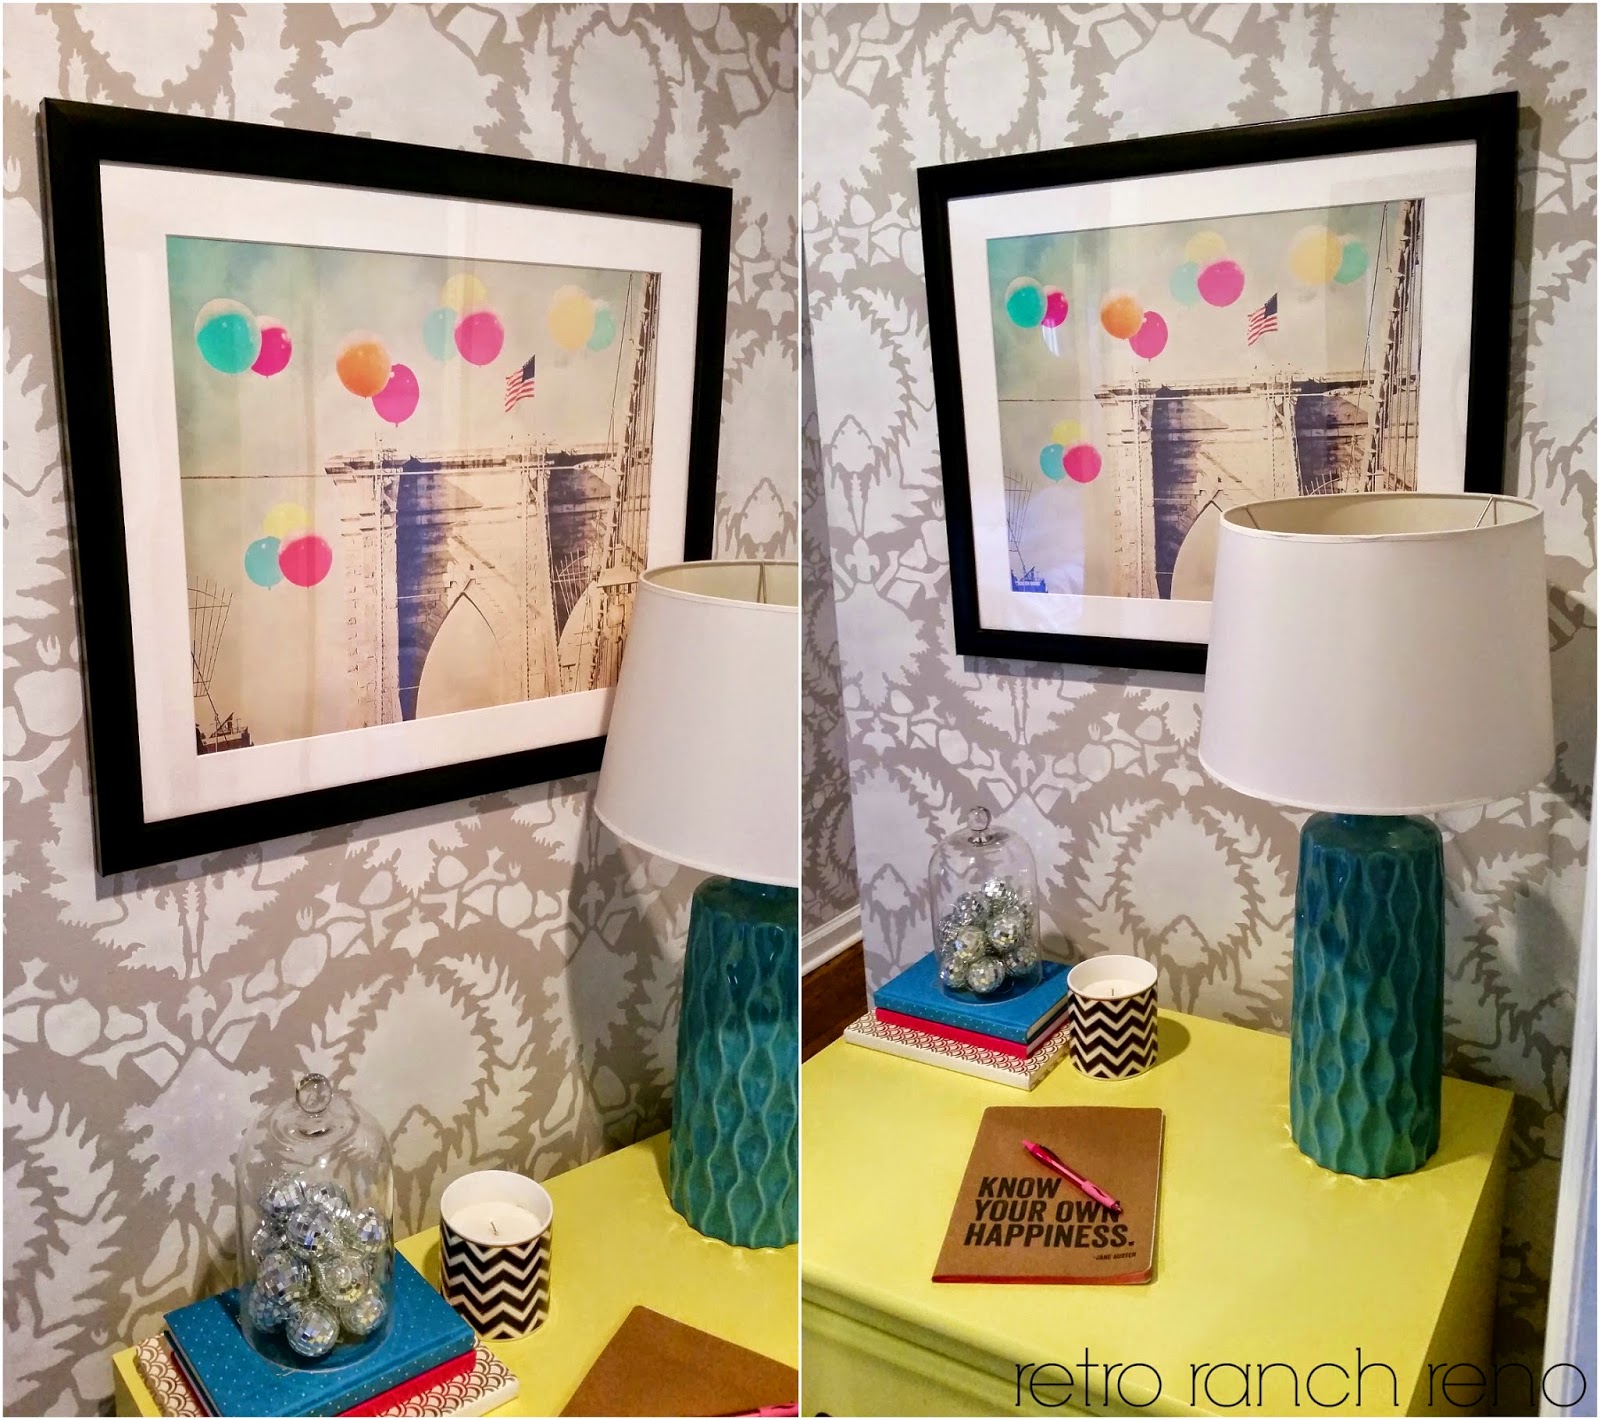
Their site is super easy to navigate, and allows you to shop by category.  I headed straight to their art page (here) and fell in love the minute I came across this piece, Balloons Over Brooklyn Bridge.


The print looked so good online, and was even better in person!!  It came matted and mounted on matboard. All I had to do was pop it into my frame and hang!


Like their name suggests, UG sells many interesting and unique gifts.  Mother's Day is just around the corner and they have a page dedicated to buying gifts for her that you can check out here. If you want to make sure you're mom's favorite, then click here to get her something good! ;)
_______________________________________________________________________

Thank you UncommonGoods for providing me with the art for this post.  All opinions are 100% honest and my own!

Wednesday, December 19, 2012

Wild Weekend.

How is Christmas only a week away?!?!?  I feel like December flew by in a flash.  And because time is just slipping away, I knew I had to take on a few nagging projects this past weekend, otherwise they wouldn’t be done until at least mid-January {but probably February if I’m being honest ;)}.

So I put my productive pants on Saturday morning and got to work.  The first thing I tackled was painting a sign for a dear bloggy friend who kindly asked for one after I posted about my cheap art for our bedroom.


Then I was determined to get some frames hung up in our hallway.  From the get-go, our hallway lacked a bit of appeal.  It was just b-o-r-i-n-g, and due to our open floor plan, you could see quite a bit of it from many areas of the house.  I tried to amp it up a bit by adding a stencil, and while it worked, I felt like it still lacked a lil' something...especially since our thermostat stuck our like a sore thumb in that space.


My solution?  Add a couple frames to the walls...and since it's Christmas time, add some free, festive printables.  I found some cute ones online, uploaded them to CVS, sized them to fit my 5 x 7 frames and picked them up the very same day.  I even had them in their frames weeks ago, I just never got around to hanging all of them.

Some were quick and easy...because I was putting them in frames already on the walls.  They went up when the rest of our Christmas decor went up.


All of the others just sat in our living room for quite some time. 


What can I say…I absolutely DESPISE hanging things.  I’m actually surprised I hung them before Christmas passed us by.  Especially since it took me months just to hang this tiny gallery wall.

Using 3M command strips and my iPhone level definitely helped to make the process much easier...on both me and my walls.


I’m super pleased with the outcome!  Now you barely notice the camouflaged thermostat.


Okay, so that’s a complete lie…but I’m going to pretend that it helps to take away from how it was all in-yo’-face before.

So after all that fun, I decided to take my efforts to South Beach our master bedroom.  I have been dying to re-arrange our bedroom for a while.  We started out here, with old furniture and not the right paint color.  Then I brought in our Craigslisted makeovers, painted the walls for the 2nd time and switched up the layout.  Well, it was time to change things again….because I was never 100% sold on how we set things up. 

Needless to say, this went down on Saturday night…


What?  Making over a room isn’t your idea of a wild Saturday night???  Well it is in this house! ;) {Kidding.  Sort of.}

Stay tuned for our bedroom changes, and even some master bath stenciling!  Woot woot!!

Wednesday, October 3, 2012

Several Months in the Making

Are you ready for it?!?!  I’m talking about a project that took entirely too many months for me to complete!!
………………………
……………………
………………
…………
………
……

No, no.  Don’t get all excited.  It’s only a teeny, tiny gallery wall took me way too long to cross off my to-do list.  {But hey, I’m all about full disclosure on this lil’ sliver of the web...even if it means embarrassing myself for all to see.}  Unfortunately, the wall ended up being one of those projects that didn’t keep my full attention.  I would get easily distracted by other stuff, and drop the gallery wall like a bad habit.  Here is how it all went down...

I started by collecting a bunch of interesting, but mis-matched frames from Home Goods in the spring.


I spray primed and painted them white.  I forgot to take a picture of this step, so instead I will include a gratuitous shot of my hubby’s backside to show our old patio-ish area that served as my spray painting spot until we demo’ed everything this summer.  All that white on the ground = proof I was spraying my heart out.


Then the poor frames sat in our guest bedroom for several weeks until I found the motivation to get to hanging.  I wasn’t sure how I wanted to arrange everything, so I played around with the frames on top of a piece of rosin paper {left over from covering our refinished hardwood floors}. 


I thought I’d trace the frames onto the paper, hang the paper, and easily transfer the arrangement from the floor to the wall, but I changed my mind midway through.  I decided to wing it, start from the “middle” {that I eyeballed} and work my way out instead.  


It wasn’t the most accurate method, and I may or may not have made a few too many holes in the wall, but it’s nothing a smidge of spackle and some paint couldn't fix. ;) 

Once everything was hung and I gave two thumbs up to the placement, the frames stayed as is...for wayyyy too many weeks.  Yup, I literally got used to seeing this...several price tag stickers and all.  Not cute.


So during our recent staycation, my Mom suggested we get busy filling the gallery wall with actual pictures.  Point taken.  The gallery wall had been 90% complete for long enough.  I started to hunt through all my photos.  My goal was to display pictures of our entire immediate family {me and hubby, our parents, my sister’s family and hubby’s sister’s family}.  Once I picked out all of the winners, it was time to turn them into B&W, and have them printed.

I also found a free fall printable online to fill up the center frame of the wall.  I wanted a pop in the middle of the black and white photos, and I love that I can switch out the 8x10 to coordinate with the seasons/holidays.


While this isn’t the most fantastic gallery wall, like say, YHL’s awesome hallway, it still warms my heart because IT’S DONE it represents our entire family.  I love having something sentimental to finally look at every day! :)

Anyone else take a crazy long time to complete the easiest projects???

Wednesday, August 8, 2012

Freshline Prints


Little by little, I added some touches to our entryway so that it wasn’t so “bleh” when you glanced towards the front door.  First was the mirror that took entirely too long to hang, then I added a fun pop of color to the front door and now I’m revealing what was in those frames hung to the right of the door.  I realize that it looks like there was already something in them, but what you don't know, is that I didn't change anything from the second I bought them.  Yup, I hung them with whatever pre-packaged "photo" came with the frames.  Classy, huh?  At least they weren't banished to our guest bedroom with the rest of the frames I purchased during a 50% off sale at Michael's. ;)

After a very non-scientific evaluation of the space between the end of our barn door track and the front wall of our home, I figured that two 8 x 10 frames would be the perfect fit next to our front door.  I knew I wanted some grey and yellow “home-themed” prints, and I also knew I wanted those prints to come from an Etsy shop that I love, Freshline.  I poured over the many beautiful things the shop owner, Colleen, has to offer, and carefully narrowed my choices down to just two prints… the Skeleton Key with Your House Number and the Welcome Sign – Home Sweet Home.


The pictures were already in the exact colors I desired, so I just had to request for them both to be printed in landscape orientation.

I placed my order and impatiently waited for the prints to arrive.  They were definitely worth the wait.  Both were just what I was looking for and fit perfectly into our home!


If anyone is looking for some beautiful, modern prints to hang in their home, I highly suggest you check out Colleen’s Etsy store!

Now, if I could just find a fun doormat for the entryway, I’ll be all set!!

Anyone else have a favorite Etsy store?!?!

Tuesday, June 5, 2012

Bye-bye Blanco!

I love white.  It's clean, it's modern...it's light and airy.  But too much of it is just plain boooooooring.

Enter this area of our home....


White
ceiling + white trim + white door + ginormous white barn door = bleh.  Okay, maybe “bleh” is a little harsh.  Let’s use sterile instead. ;)

So with a little paint and a little effort, our front door went from boring white...


...to a fun, icy blue!


Of course the addition of an old mirror and a couple new frames also helped to spruce up the space a bit.  Sometimes I am still amazed at how a splash of color and a couple accessories can make a space feel more and more like home.

Yay for crossing more things off the "to-do" list...no matter how small they may be!! :)